Omnichannel – Data Masking Rules

There are various scenarios in which companies would be quite keen to utilise data masking rules. Examples of these include:

  • Masking credit card details, so that firstly the company isn’t required to comply with credit card handling information requirements, and secondly (and potentially more importantly!) there’s no risk of an agent copying down a credit card number, and using it fraudulently
  • Masking personal information – if a customer mistakenly types in their Social Security Number, UK Tax Reference, etc, then the company is likely to want to avoid having their support agents seeing this sensitive information
  • Socially offensive language – companies will be extremely keen to avoid having their staff exposed to offensive language and behaviour

There are obviously other examples of these as well – you can feel free to let your mind run free as to the possibilities.

Omnichannel for Dynamics includes what are referred to as ‘Data Masking Rules’. Using these, you can create rule/s that will then be used to identify the undesired words (or other types of data) within a conversation, and these will then be automatically masked with the asterisk (*) character. Data masking works for chat and async channels.

Now, a few things to keep in mind. Data masking is done through the use of regular expressions, also know as ‘regex’ (when I heard this, I needed to go and look up what a ‘regular expression’ is, as I had no idea! If you have no idea as well, take a look at https://en.wikipedia.org/wiki/Regular_expression , which has a good summary of things).

Currently, there is a HARD LIMIT of 10 data masking rules. Yes, you read that correctly. You are ONLY able to have 10 rules saved. However if you play cool, there’s a way around it, thanks to the way that regex expressions can work.

So, let’s look at how to set up and configure these data masking rules. As with practically everything else that’s set up in Omnichannel, you’ll need to be in the Omnichannel Administration Hub. Scroll down in the left hand menu, and you’ll find it under the Settings section:

Click on it to open, and you’ll presented with a slightly different looking screen than you’re used to. It’s not a general view/list of records – it’s a static screen, with a grid of rules on the right:

The two settings on the left hand of the screen are really quite important. They are:

  • ‘Mask private agent data from the customer’. What this does is mask data that the agent is sending, for both the agent and the customer (ie the agent won’t be able to see the data either, even though they’re typing it). This applies for both live chat and async channel messages.
  • ‘Mask private customer data from the agent’. This will mask data that the customer is sending to the agent, for both the customer and the agent. This is only masked for live chats for both; when using async channels, it’s only masked for the agent interface (ie the customer will still be able to see the data)

Note: If only the first option is enabled, then if the customer types in data matching the masking rule, it will not be hidden, and vice-versa for the second option. It’s therefore vitally important to consider all of the relevant scenarios for the company, and apply these settings appropriately.

Note: Data masking isn’t just through the chat interfaces – it’s also how the data is stored. So if you open up a transcript, or get to check the data within the database, it’s also masked there, which means that it’ll allow you to be fully compliant with everything! A side effect of this is that the sentiment analysis

There are 3 rules provided for you out of the box (in an inactive state). They are:

  • Credit Card: Masks the credit card number, if provided in a message.
  • Email: Masks the email address, if provided in a message.
  • SSN: Masks the SSN, if provided in a message.

Opening up one of these shows us how Microsoft is implementing these:

There’s the name (which you can put whatever you want to), and a description (which is always helpful and useful!). Then there’s the regular expression (I’m not going to go into details as to how to actually put these together – there are plenty of resources out there. Take a look at https://docs.microsoft.com/en-us/dotnet/standard/base-types/regular-expression-language-quick-reference as a starting point). The character used for masking can’t be changed (at this point in time – perhaps in the future they’ll allow this to be changed).

The really great thing from my perspective is the testing area on the right hand side of the form. Here you can input your text, and see if it actually matches the conditions for the regex (or not, as the case may be). This will allow tweaking of the regex etc:

Just please be aware that you need to click or tab out of the ‘enter test data’ field in order for the ‘masked test data’ value to update

Once you have a rule in place, save it, and click ‘Activate’! Otherwise the rule will be saved, but won’t actually work!

Now, remember that I mentioned above about the limit of only TEN data masking rules? Well, here’s a great little tip as to how to work around this, as there are many legitimate examples of needing many more than ten!

So how do you go about doing this? Well, it goes something like this:

  1. The ‘Regular Expression’ field is actually of type ‘Text’ (with it being ‘Single line of text’). This means that it can actually hold up to 4000 characters in it (according to https://docs.microsoft.com/en-us/dynamics365/customerengagement/on-premises/customize/types-of-fields )
  2. There’s a cute little character that exists – this is the ‘|’ character (also known as the pipe character)
  3. Using the pipe character, you can separate regex expressions, which will be evaluated separately
  4. Therefore you can ACTUALLY have multiple regex expressions in a single data masking rule!

Let’s see this is set up!

And now to see it through the actual interface:

So with this, though it might take a bit of time and testing (and double-checking, to make sure it’s working absolutely correctly, of course), it’s possible to have quite a lot of regex expressions for you to use!

Omnichannel – Wave 1 2020

A week ago, the release notes for Wave 1 2020 come out, covering both Dynamics 365 ( https://docs.microsoft.com/en-gb/dynamics365-release-plan/2020wave1/) and the Power Platform ( https://docs.microsoft.com/en-gb/power-platform-release-plan/2020wave1/). Well, people have been VERY eagerly waiting for these, and my news feeds started to blow up with people commenting on the new features that are coming out.

I’ve been very carefully reading through them to see what’s applicable for Omnichannel, as well as researching other sources. The great news is that there’s some really cool stuff that’s going to be released within this (or before!) for Omnichannel – to date we’ve had a good start as a baseline for the product, and this is going to enhance it further (obviously there are going to be continual developments, and it’s really reassuring to see the effort that Microsoft are putting in to this to get it right).

Incidentally, this is how Microsoft actually talk about Omnichannel within the release notes:

A true omnichannel experience in the product will preserve context and provide a continuous experience as customers seamlessly switch across self-service, peer-to-peer service, and assisted-service channels. An empowered agent experience will provide an application experience that is unified across channels and line-of-business (LOB) applications, is contextual to the engagement, and comes with productivity tools to resolve issues faster

So, without further ado, here we go! (I’m including the dates that are applicable to each item for reference)

Digital messaging support for Microsoft Teams

Public Preview – April 2020. No current date for GA release

Companies that are already using Teams for communications will be able to use it for internal support delivery, thereby reducing the number the tools that the business needs to manage. This will allow employees to raise items internally through Teams, which will feed through to teams using Omnichannel for internal company purposes.

  • The Teams channel will be able to be configured through the Omnichannel Administration Hub
  • Employees can get support using Teams
  • Agents (the internal support team/s) will be able to use the Omnichannel for Customer Service Hub to answer and serve the employees
  • Reports can be run on these interactions to help enable the support centre/s to be run effectively and efficiently.

Digital messaging support for Whatsapp (Twilio)

Public Preview – April 2020. No current date for GA release

The communication methods will expand to include the ability to have communications through WhatsApp Messenger. This is a widely used mobile app throughout the world, and people will be able to use it to contact companies directly

  • The WhatsApp channel will be able to be added & configured in the Omnichannel Administration Hub
  • Support agents will access and serve customers through the Omnichannel for Customer Service Hub

Digital messaging support for LINE

Image result for line software"

GA – April 2020

Businesses will be able to add a communication channel for LINE communications (see https://en.wikipedia.org/wiki/Line_(software) for further information about LINE).

  • The LINE channel will be able to be added & configured in the Omnichannel Administration Hub
  • Support agents will access and serve customers through the Omnichannel for Customer Service Hub

Digital messaging support for SMS (Twilio)

Image result for sms"

GA – April 2020

Currently Omnichannel support SMS through Telesign. Wave 1 will include additional capabilities to access SMS through Twilio. Customers will require a Telio SMS subscription to leverage this.

  • The SMS channel will be able to be added & configured in the Omnichannel Administration Hub, using Twilio as a provider
  • Support agents will access and serve customers through the Omnichannel for Customer Service Hub

Digital messaging support for WeChat

Image result for WeChat"

GA – April 2020

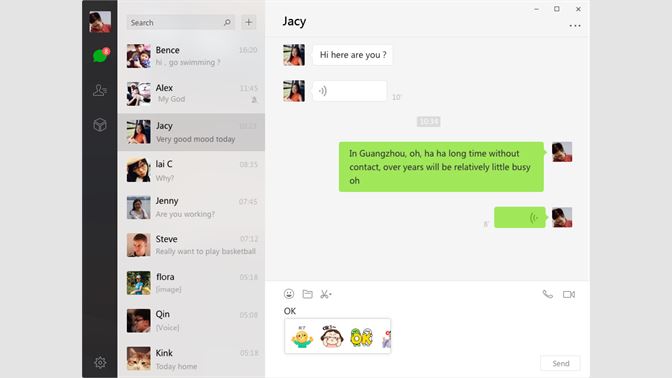
Any company that has business in China will be aware of WeChat. It’s similar to WhatsApp Messenger, through with admittedly greater capabilities (people can pay for goods using WeChat, transfer money, and carry out a variety of other tasks).

This release will add native WeChat capabilities for Omnichannel, which will be of major benefit to companies that have Chinese clients.

  • The WeChat channel will be able to be added & configured in the Omnichannel Administration Hub
  • Support agents will access and serve customers through the Omnichannel for Customer Service Hub

Digital messaging support for Twitter

Twitter website on desktop

GA – April 2020

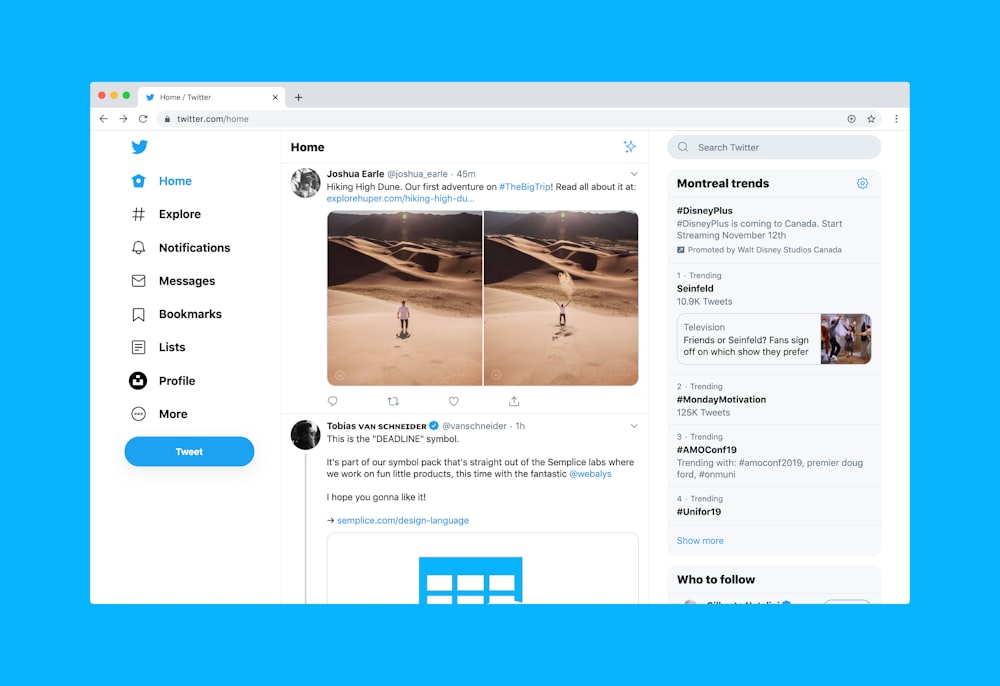
Wave 1 will allow customers to engage with companies through Twitter, using Twitter Direct Message (DM’s). The end-user experience will be directly through Twitter, whilst the agent experience will be using Omnichannel

  • The Twitter Direct Message channel will be able to be added & configured in the Omnichannel Administration Hub
  • Support agents will access and serve customers through the Omnichannel for Customer Service Hub

Raise live chat conversations to a voice/video call

GA – April 2020

Expanded channel choices will allow customers to raise a conversation from the live chat experience to a voice/video call. This in turn will allow queries to be expedited and resolved in less time, as well as allowing agents to better understand what the customer is trying to achieve, and creating a more personal interaction with the customer.

  • Chats will be able to be configured in the Omnichannel Administration Hub to enable the elevation of the chat to voice and/or video
  • Agents will be able to elevate a text chat to a voice and/or video conversation during a support session
  • Common audio & video controls to be available for agents (eg camera on/off, mute/unmute)

Co-browse capabilities through 3rd party providers

Public Preview – January 2020. GA – April 2020

One of the most frustrating things about providing support to someone is that occasionally you wish you could actually see their screen, just to understand what the customer is actually doing! Well, this is coming to Omnichannel!

Agents can better help customers when customers can show agents what’s happening on their device. In this release, API & related artifacts are being provided that will allow partners to integrate existing 3rd party co-browse solutions. There are already several partners working together with Microsoft to get this out there, and I’m sure that there will be more over time.

Remote assistance capabilities through 3rd party providers

Public Preview – January 2020. GA – April 2020

Following on from the item about regarding co-browsing, the next logical step is to be able to have a support agent accessing a device to address an issue, rather than trying to walk the customer through what could be some quite technical steps.

In this release, API & related artifacts are being provided that will allow partners to integrate existing 3rd party co-browse solutions. There are already several partners working together with Microsoft to integrate their products with Omnichannel

All in all, I’d say that the above capabilities that will be coming to Omnichannel are really encouraging, and I can’t wait to play (and talk through) them! I’m also starting to wonder what goodies will be dropping for Wave 2!

Quick Responses in Omnichannel

We’ve all had these types of scenarios. You know, when you’re needing to type the same response (or similar ones) time and time and time again to customers. Or alternatively queries can be grouped together under different topics, and you just wish there was a way to quickly and easily answer these, rather than manually answering each customer.

Thankfully, there is indeed such functionality within Omnichannel! No longer do you need to type out general responses (or indeed custom responses) each and every time that a customer requests some information about something, or when helping them out.

In Omnichannel, these are called ‘Quick Responses’, and are really incredibly easy to use.

As a default, the system ships with some quick responses already loaded in, and available to use. This covers usual circumstances such as ‘Hello, how may I assist you?’, ‘Your patience is appreciated. I will be with you shortly’, and also ‘This chat service is permission based. Before a chat begins, no data is collected about you beyond the information which websites usually collect. Once an invitation is accepted, all chats are monitored for quality assurance purposes. Any information gathered is for internal use only.’

In fact, not only are these pre-loaded in English, they’re actually pre-loaded in 23 other languages as well! (at the time of writing, that is – I’m sure there will be more to come)

Now these are all very well and good for generic customer service. What makes this really cool though is that you can create your own ones, and then use them.

Setting them up is really simple and straightforward. Make sure that you’re in the Omnichannel Administration Hub, scroll down in the left side navigation bar to ‘Quick Replies’ (in the ‘Agent Experience’ section), click it, and then click the ‘New’ button on menu ribbon bar:

Give the record a title to identify it by, select a local, and then enter the message that you’re wanting to use:

Now all the agent needs to do in the chat window is use the ‘/q’ command (without the quotation characters, of course). Typing this will bring up the Quick Response window in the chat session.

The agent can then type in a keyword, and the list of available quick replies will be filtered to just those that have the keyword in it:

Note that due to the way in which Omnichannel works, it can sometimes take a little time before the new Quick Reply entries will appear for the agent to use in the chat interface

Clicking on the line that they want to use will then populate the text from that quick reply into the chat window. The agent can modify it if they want to, and then send it to the customer:

This is a really helpful feature, and can assist greatly in speedier responses to customers, as well as cutting down on the time needed for interactions!

Omnichannel for Dynamics 365 – Chat Transcripts

We’ve all been there (well, at least I have). We’ve been having an online chat with a customer service person at a company, and we’re wanting to have a record of the actual chat that took place. Of course we could (hopefully) copy and paste the entire conversation into a document and save it, but that would be laborious, and also potentially not be legal proof of the actual conversation.

In some cases, companies may actually encourage customers to save a record of their chat history on their account (as an example, Amazon offers this at the end of each chat). Customers can then return at a later date to download the conversation to their own computer at their leisure, which can be more convenient at times (say you’re travelling on holiday, and don’t have your own computer with you!). It could even be possible to get it automatically emailed to your own email address, which would also allow a company to add additional information to it (for example a feedback survey request on your chat experience, some marketing information, etc)

Well, Omnichannel has the ability for this, in multiple ways! It can allow a user to:

  1. Download a full transcript at the end of the chat
  2. Email a full copy of the chat transcript

Both of these features are available from the chat window using icons, allowing a quick and easy experience for the users. You can decide if you want to allow one or the other, or both, quite easily.

Enabling this is quite simple, though there are some additional options to set for the auto-emailing feature (basically selecting the email template and user mailbox – you can set up a specific mailbox to use if you’re wanting it eg ‘customerservice@abc.xyz’).

In the Omnichannel Administration Hub, open the Chat channel that you’re wanting to enable this for. Under the ‘Chat Transcripts’ section, select the option/s that you’re wanting to enable:

Downloading the chat transcript

At any time during the chat conversation, users can click the download icon at the bottom left of the chat window, and the conversation will be downloaded to their default Downloads folder on their computer.

This saves as an HTML file, and when opened looks like this:

At the end of the chat, the person will be prompted and asked if they’d like to save the conversation, with quick instructions as to how to do so. Obviously this option will ensure that the customer has the complete conversation, rather than just a part of it, so this reminder is really nice and helpful in my opinion

Emailing the chat transcript

Customers can also get the chat transcript auto-emailed to their email address. Clicking the email icon will prompt the customer to enter their own email address (or whichever email they’d like the chat transcript to be sent to).

This option allows companies to be able to format the email template that’s used for this. Examples of things that a company might want to do could include:

  • Using company logo’s, images and fonts
  • Feedback survey information, to understand how the customer felt about the chat session
  • Marketing material for upcoming events

Note: When setting up the ability for chat transcripts to be emailed, don’t forget to approve and test the mailbox being used in the Email Configuration settings! If you don’t do this (or it hasn’t already been done), they won’t be emailed out!

There’s also one further piece of configuration that needs to be carried out for emailing chat transcripts. As all emails from that chat channel will be using the same email address to send out the emails, this means that the ‘Allow send on behalf of’ option must be selected on the mailbox user’s personal settings. You’ll therefore need to log into Dynamics as the mailbox user, open personal options, and set this manually

In summary, this is really helpful to customers, and a great little feature for Omnichannel.

How to handle error AADSTS65001 when trying to configure Omnichannel for Dynamics 365

I’ve been contacted by several people over the last few days who have been experiencing an error when trying to get Omnichannel configured. It looks something like:

The actual text of the error is: AADSTS65001: The user or administrator has not consented to use the application with ID ’18cc9627-776c-4142-b8f5-9cd83517e3bb’ named ‘Omnichannel for Customer Service’. Send an interactive authorization request for this user and resource. Trace ID: 36dd2358-2d41-463c-a2f6-013038636400 Correlation ID: 9ac093cd-e525-4bb4-b277-3ac8e7478b6b Timestamp: 2020-01-07 12:14:15Z

No matter what people tried, they still got it. I went through the process of setting up a completely new environment – lo and behold, I got the same issue! (the screenshot above is actually from my system). Incidentally this is why it’s so important to be able to replicate an issue, so that you can confirm what’s actually causing it to happen.

Reaching out to some very helpful people at Microsoft, I (thankfully) got a quick response from them

Essentially, there are some issues with Azure Active Directory (AAD) consent flows for applications at the moment (it’s not specific to Omnichannel). There’s a fix that’s being worked on, but no idea when it will be finished and rolled out.

They were nice enough to share with me how to address it, which is what I’m now sharing here! To fix this issue, carry out the following steps to manually grant permissions to the application:

1. In your Azure Portal, search for ‘Azure Active Directory’ in the search bar, click on it when it comes up, and navigate to Enterprise Applications in the left hand bar. Alternatively you can use https://ms.portal.azure.com/#blade/Microsoft_AAD_IAM/StartboardApplicationsMenuBlade/AllApps/menuId/to get you straight there.

Click it to open, and you’ll see a list of the enterprise applications that use AAD.

2. You’ll then want to search for the application that has the issue (in this case, Omnichannel)

You’ll want to double-check that the ‘Application ID’ is the SAME as the Application ID that you’re getting in the error message, especially if there are multiple results coming up in the search list!

Once you’re sure that it’s the correct application, click it to open it.

3. You’ll see a section in the left bar called ‘Security’, and under this should be an entry for ‘Permissions’. When this opens, you’ll see a button in the main window called ‘Grant admin consent for User‘.

4. Click this – it’ll cause a window to pop up, where you’ll grant permissions for the application. Once granted, the window will automatically close.

You can then go back to the place where you were experiencing the error, and it should work!

Proactive chat in Omnichannel for Dynamics 365

We’ve all been there. We’re on a website page, trying to understand it, and not really getting anywhere. Whether it’s about how to fill in a form, or technical instructions and information, our mind has gone blank. The words are on the page, but they’re just not making sense – and we don’t know what to do!

What would we say if suddenly a prompt came up, asking if we needed some help with understanding things, and offering to connect us with a live agent if we wanted some assistance? Well, quite a lot of people would be grateful for that, I’d think.

There are quite a few websites out there that have this functionality – I know that I’ve seen it on various sites I’ve been on, though it’s not always been implemented in the best of ways.

Well, now Microsoft have decided to bring in their own form of it, and it sits right within Omnichannel for Dynamics 365! It’s able to allow customers to interact either with a bot or with a live agent, depending on how you’ve configured it to work.

Currently it’s in Preview, but I’m expecting it to move to General Availability soon.

Even better, Microsoft have even released a short video around it!

There are two parts to configuring it:

Firstly, you need to enable Proactive Chat. Go to your Chat channels under Omnichannel Administration, open up the Chat record you’re wanting to have Proactive chat enabled for, and change the ‘Enable Proactive Chat’ option to Yes (obviously if you don’t have any chat channels set up, you’d need to create a new one)

Secondly, there’s some code that needs to be embedded on the actual web-page that the chat is active on. Now I know what some of you are thinking – ‘how the heck do I code’? (OK – so the developers aren’t thinking that – they’re thinking ‘oh goodie!!’. Well, I’m not from a development background myself, but I managed to get it to work quite easily. Take a look at https://docs.microsoft.com/en-us/dynamics365/omnichannel/developer/how-to/start-proactive-chat , where several different scenarios are shown (along with sample code), and you can tweak these as required.

The result then looks like:

This is really helpful. I can then click the ‘Chat Now’ button to start the chat. What I’m also really liking about the experience is that the chat option/window floats on the bottom right side of the screen, so no matter where I am in the page, it’s available (and easily able to be seen)

There are many different ways in which this can be configured. Some of the immediate ones that come to mind (but by no means all of them) are:

  • Someone staying on a webpage for a long period of time
  • Someone who keeps coming back to the same page (perhaps they’re lost, and not able to find what they’re looking for)
  • Someone on a support portal looking at a support case, and wanting to see more information on it
  • Someone coming from a specific webpage to another page
  • Someone accessing the webpage from a specific location (eg country) in the world
  • Special offers being available during a specific time-frame, and only website visitors during that time get the option for the special offers

It’s a really helpful addition to the current Omnichannel capabilities, and I’m sure that there will be many more to come!

Omnichannel for Dynamics 365 – Skills Part III

The previous post in this mini series looked at how we go about enabling skill-based routing (https://thecrm.ninja/omnichannel-for-dynamics-365-skills-part-ii/).

What we’re now going to do is understand how we go about attaching skills (which we’ve already learned how to set up) to conversations. The premise behind this is that when a customer will access Chat on a website interface, they’ll be presented with one (or more) pre-chat survey questions. The answer/s that are given are then used as skills, and the chat session will be automatically routed to the user who is best placed to help the customer. This is done based on the skill-attachment rules, which we’re now looking at.

There are two types of options available for skill matching:

  1. Exact skill matching. The skill attachment logic looks for the exact skill/s and proficiency level that an agent should have to work on the conversation (and uses this as the minimum criteria). Then it searches for an available agent with these, to route the conversation to. If the minimum criteria aren’t met, then it searches for a higher proficient level. If no agent with a higher proficient level is found, then the conversation remains in the queue
  2. Closest skill matching. This initially works the same as the exact skill matching. The system will identify the skill/s and minimum proficiency levels, and see if there’s an agent available. If not, it’ll search for a higher proficiency level. All the same so far. But if there are no agents matching (or having a higher) proficiency level, it will look for any agents that are available with a lower proficiency level, and route the conversation to them

To create a new skill attachment rule, you’ll need to create (or modify an existing) workstream (we’re going to look at workstreams in another post)

Go to Skill Attachment Rules, select the type of matching logic that you’re wanting, and create a new rule (assuming you’re not modifying an existing one)

In the new rule window that opens, fill in the necessary information on the left hand side. You can then start to set up your rule conditions (and oh boy can these be complicated!) in the Condition box on the right.

Once done, hit the Save button, and the Skills section box will become active. Clicking the ‘New Attach Skill’ button in this box will allow you to select the skill/s and proficiency levels that you’re wanting to use.

Click the ‘Save and Close’ button, and it’ll appear in the Skills box. If you’re wanting to add more than one skill at a time, click the arrow on the Save & Close button, and click the ‘Save and New’ option.

If you then go back to the Workstream record, you’ll need see this appearing in the Skills Attachment Rules section.

Omnichannel for Dynamics 365 – Skills Part II

In the previous post, we started to learn how we go about setting up Skills for Omnichannel within Dynamics 365 (https://thecrm.ninja/omnichannel-for-dynamics-365-skills-part-i/).

In this post, we’re going to see how we enable Skill-Based routing within Omnichannel, as in order to use skills, we need to enable it! (seems obvious, right?).

To do this, we need to be signed into the Omnichannel Administration app, and we then go to ‘Skill Based Routing’, which is under the Settings area in the left-hand side navigation bar:

Clicking here brings up the skill-based routing settings. At the time of writing, this feature is still in preview, and shows an information window declaring this (this will disappear once it goes GA)

Clicking on the toggle slider will change the value to ‘Yes’, and will enable it. It’s also shown nicely in green, which is something that I’m really liking!

Select a Rating Model to use, from the right hand grid. As touched upon in the previous article, rating models are used to set how proficient a user is with a specific skill. You can have multiple rating models saved, and use them for specific scenarios.

Rating Models are made up of two parts:

  1. Rating Model (being the name of the rating model, and the minimum/maximum rating values allowed)
  2. Rating Values (the actual values being used – the number of rating values should be the same as the range for the Rating Model minimum/maximum that you’ve set)

In the next article (https://thecrm.ninja/omnichannel-for-dynamics-365-skills-part-iii/) we look at how we go about attaching skills to conversations

Omnichannel for Dynamics 365 – Skills Part I

We’ve already gone through and taken a look as to how we set up Queues (https://thecrm.ninja/omnichannel-for-dynamics-365-queues/) and Users (https://thecrm.ninja/omnichannel-for-dynamics-365-users/). The final part of this trio is looking at how we set up Skills in Omnichannel, and apply them (which is going to be in several parts, due to the complexity of this one item!)

As we’ve previously covered (https://thecrm.ninja/omnichannel-for-dynamics-365-queues-users-skills/), skills are used within Omnichannel to enable Skill-Based Routing.

There are several parts to getting this working:

  1. Setting up the actual skill entries
  2. Enabling/configuring skill-based routing
  3. Enabling/configuring the ability for chats to utilise skill-based routing

Yup – it’s somewhat more complex than just saying ‘I want skills!’

So this post is going to cover how to actually set up the skill record entries, which thankfully isn’t too difficult (especially if you’ve been bearing with me, and following the other setup instructions that we’ve been through so far).

To create skills, it’s necessary to have a skill type. Think of it as a hierarchy – if you’re wanting to provide customer services in multiple languages for technical issues, you’re going to want a Language skill type, and Technical skill type. Under each skill type, you’re going to have the applicable entries. So for Language, you’ll have English, Spanish, Chinese, etc.

At the time of writing, creating Skill Types are done from the Systems Customisation (this will likely move to the new Admin Centre at some point, but hasn’t yet). So make sure that you’re logged in as a Dynamics system Administrator, and open Advanced Settings:

Note: The process below is taking place in the default solution. It’s of course possible to deploy this as part of a custom solution – if you’re wanting to do this, then open the custom solution from the Power Platform admin centre, and continue with the steps shown below.

Hover over ‘Settings’ in the ribbon menu bar, and choose Customisations

Now select ‘Customise the System’

Select ‘Option Sets’ in the left hand navigation, then scroll down to ‘Bookable Resource Characteristic Type’ in the main window

Open up, and you’ll see the following window

Using our scenario, I’ve added Language and Technical Area as skill types. Now very importantly, ensure that you SAVE the record, and then PUBLISH it. If you don’t, the skill types won’t show to be used!

Right, now that we’ve done all of that prep work, we can get on with actually entering the skills that we want to use…

So, go back to the Omnichannel Administration section, scroll down in the left hand menu to Skills, and click it to open it. It’ll show all of the skills that we’ve entered (well, it won’t show any entries here yet, as none have been put in yet!). Click ‘New’ on the menu ribbon to create a new entry

You’ll be presented with the following screen, which after all of the above is thankfully quite simple.

The fields are as follows:

  • Name. What it says on the field – nothing complicated. It does need to be unique though, so have a careful think about your needs. You can always use multiple skills together to create a blend that you need across skills
  • Type. This is the Skill type (which we’ve just set up beforehand). If you don’t see the values that you’ve set up in here, make sure that you saved and published the customisations!
  • Description. Put something user-friendly in here to describe what the skill is (if you think it’s necessary…)

Then click ‘Save’ on the menu bar. Once the entry saves, the form will update, and now show a User (Agent) section:

You can now add users (agents, as they’re referred to) to the skill. Click the ellipse on the right hand side of the Users (Agents) grid, and then select the ‘New Bookable Resource Characteristic’ option (the names of these things just keep on getting longer and longer, don’t they!)

A nice simple window will open on the right of the screen, where you can enter the details:

This is done as follows:

  • Skill Value – this is the skill that you’re wanting to assign a user to
  • User (Agent) – this is the actual user. You can type to search through the available users. Very important to note that if you didn’t follow the steps to set up the user as a Bookable Resource, you won’t see them in this list (see https://thecrm.ninja/omnichannel-for-dynamics-365-users/ for instructions on how to do this)
  • Rating Value – this is used to rate the proficiency of the user at the skill. We’ll cover setting this up in a later post, but essentially think of using a 5 star scale. 1 would mean the user has basic ability at the skill, 3 would mean they’re alright with the skill, and 5 means that they’re at the top of their game with it

You can then click the ‘Save and Close’ button at the bottom of the window, and it’ll add them.

However if you have multiple users that you’re wanting to add, I’d HIGHLY recommend clicking the arrow next to this button, and selecting the ‘Save and Create New’ option. It’s not just to create with the same skill – you can change the Skill Value as well, and it’ll save you more clicks!

Hopefully you’re still following along, and managing to get the setup done correctly – well done!

Up next – enabling skill based routing( https://thecrm.ninja/omnichannel-for-dynamics-365-skills-part-ii/)

Omnichannel for Dynamics 365 – Users

Now that we’ve set up and assigned Omnichannel security role/s for the users in the system who need access to Omnichannel (https://thecrm.ninja/omnichannel-for-dynamics-365-security/), and seen how queues work (https://thecrm.ninja/omnichannel-for-dynamics-365-queues/), we’re going to look at how we manage users and the various pieces of information for them.

To do this, we need to be in the Omnichannel Administration application (accessed through the Dynamics 365 navigation bar), and select the ‘Users’ option under ‘Queues & Users’

If you hover over a user, you get a quite useful little window, showing their status and some details

Double clicking on the user will open up the system user record. The important thing to note is that there’s now an ‘Omnichannel’ tab available.

From here, it’s possible to set the users default presence (such as Available, DND, Busy, etc – you’re able to add new entries to this list) and capacity.

Capacity is a sort of loose term. Essentially (as we’ll cover in another post) it’s possible to set up different enquiry types. Each enquiry type will have a capacity against it, based on how complex you think it’ll be. So for example checking an order may have a lower capacity set against it than someone dealing with a damaged item.

Capacity is used with routing rules (which will also be covered in another post). When a communication channel is opened up, the system will check to see which agent/s are showing as available, and of those agent/s, which one/s have available capacity for the session (as they may be already dealing with other sessions at the same time).

You’ll also be able to see a list of the Queues that the user has been assigned to.

What you’ll now do is add a Bookable Resource record for the user. What is this exactly?

A bookable resource is anything that can be scheduled. Field Service uses this as well, usually covering people, equipment, and physical spaces (facilities). Each resource can have different attributes that distinguish it from others, including but not limited to:

  • Characteristics (eg Accounting)
  • Categories (eg Manager)
  • Territories (eg United Kingdom)
  • Organisational Unit (eg Customer Service)
  • Location (eg London)
  • Resource Type (eg User)

Omnichannel uses scheduling to know which users are available, assigned to specific queues, etc. Due to this, we need to create this ‘Bookable Resource’ record (which is unique – you can only have one of these for each user!).

To create this, scroll down the page, until you get to the ‘Skills Configuration’ section. Here you should click the menu ellipse, and select ‘New Bookable Resource’.

This will open the ‘New Bookable Resource’ window. Leave everything as it is, and just fill in the ‘Name’ field with the name of the user

Click the save button on the menu bar, and it’ll then take you back to the user record. Well done! You’ve now created the Bookable Resource record for the user.

In the next section, we look at how to start setting up Skills – https://thecrm.ninja/omnichannel-for-dynamics-365-skills-part-i/