Solution deployments: Automated vs Manual

Over the holiday period, I’ve been playing around with solution deployments. OK – don’t judge me too much…I also took the necessary time off to relax & get time off work!

But with some spare time in the evenings, I decided to look a bit deeper into the world of DevOps (more specifically, Azure DevOps), and how it works. I’ll admit that I did have some ulterior motives around it (for a project that I’m working on), but it was good to be able to get some time to do this.

So why am I writing this post? Well, there’s a variety of great material out there already around DevOps, such as https://benediktbergmann.eu/ by Benedikt (check out his Twitter here), who’s really great at this. I chat to him from time to time around DevOps, to be able to understand it better.

However, I ran into some quite interesting behaviour (which I STILL have no idea why it’s the case, but more on this later), and thought that I would document it.

Right – let’s start off with manual deployments. As we know, manual deployments are done through the user interface. A user (with necessary permissions) would do the following:

  1. Go into the DEV environment, and export the solution (regardless of whether this is managed or unmanaged)
  2. Go into the target environment, and import the solution

Pretty simple, right?

Now, from an DevOps point of view, the process is similar, though not quite the same. Let’s see how it works:

  1. Run a Build pipeline, which will export the solution from the DEV environment, and put it into the repository
  2. Run a Release pipeline, which will get the solution from the repository, and deploy it to the necessary environment/s

All of that runs (usually) quite smoothly, which is great.

Now, let’s talk for a minute about managed solutions. I’m not going to get into the (heated) discussion around managed vs unmanaged solutions. There’s enough that’s been written, said, and debated on around the topic to date, and I’m sure it will continue. Obviously we all know that the Microsoft Best Practise approach is to use managed solutions in all non-DEV environments..

Anyway – why am I bringing this up? Well, there’s one key different in behaviour when deploying a managed solution vs an unmanaged solution (for a newer solution version), and this is to do with removing functionality from the solution in the DEV environment:

  • When deploying an unmanaged solution, it’s possible to remove items from the solution in the DEV environment, but when deploying to other environments, those items will still remain, even though they’re not present in the solution. Unmanaged solution deployments are additive only, and will not not remove any components
  • When deploying a managed solution, any items removed from the solution in the DEV environment, and then deploying the solution to other environments will cause those items to be removed from there as well. Managed deployments are both additive & subtractive (ie if a component isn’t present in the solution, it will remove it when the solution is deployed)

Now most of us know this already, which is great. It’s a very useful way to handle matters, and can assist with handling a variety of scenarios.

So, let’s go back to my first question – why am I writing this post? Well..it’s because of the different behaviour in manual vs automated deployment, which I discovered. Let’s look at this.

When deploying manually, we get the following options:

The default behaviour (outlined above) is to UPGRADE the solution. This will apply the solution with both additive & detractive behaviour. This is what we’re generally used to, and essentially the behaviour that we’d expect with a managed solution.

Now, when running a release pipeline from Azure DevOps, we’d expect this to work in the same way. After all, systems should be build to all work in the same way, right?

Well, no, that’s not actually what happens. See, when an Azure DevOps release pipeline runs, the default behaviour is NOT to import the solution (we’re talking managed solutions here) as an upgrade. Instead (by default), it imports it as an UPDATE!!!

This is what was really confusing me. I had removed functionality in DEV, ran the build pipeline, then ran the release pipeline. However the functionality (which I had removed from DEV) was still present in UAT! It took me a while to find out what was actually happening underneath…

So how can we handle this? Well, apart from suggesting to Microsoft that they should (perhaps) make everything work in the SAME way, there’s a way to handle it within the release pipeline. For this, it’s necessary to do two things:

Firstly, on the ‘Import Solution’ task, we need to set it to import as a holding solution.

Secondly, we then need to use the ‘Apply Solution Upgrade’ task in the release pipeline

What this will do is then upgrade the existing solution in the target environment with the holding solution that’s just been deployed.

Note: You will need to change the solution version to a higher solution number, in order for this to work properly. I’m going to write more about this another time, but it is important to know!

So in my view, this is a bit annoying, and perhaps Microsoft will change the default behaviour within DevOps at some point. But for the moment, it’s necessary to do.

Has this (or something similar) tripped you up in the past? How did you figure it out? Drop a comment below – I’d love to hear!

Managed Solutions, & replacing a field

Well to start with, I’m sure that I’m going to get pulled up by some people for my use of the word ‘field’ in the title. After all, officially it’s now a ‘column’! But I (still) can’t let go of calling them as I’ve done so for over a decade, so field it is.

Now to the actual topic of this blog post, which is centred around Managed Solutions. Leaving aside the whole debate about whether we should be using managed or unmanaged solutions (& when/where to do each), there is one definitive benefit of using a managed solution.

See, unmanaged solutions are additive in nature. Work is done in the development environment, then deployed. Further work is done (additional items added, etc), and deployed, and they then appear in the downstream environments. However, if you delete an item in the development environment, it’s not removed when the solution is deployed downstream.

Managed solutions, on the other hand, are both additive & detractive. As with unmanaged solutions, items added in the development environment are also added downstream when deployed. However, if an item is removed from the solution in the development environment, it will also be removed when the solution is deployed downstream. It’s one of the useful ways to ensure that you don’t end up with random unused items just lying around in Production (which have a habit then of popping up in the Advanced Find window, for example). So it’s really quite handy for a lot of reasons to go down this route.

Well, I found myself going down this route recently, but with slightly unexpected results, I’ll freely admit…

The scenario was that we had deployed a managed solution to the UAT (test) environment on a client project. Then the client changed their mind (shock & horror!!) as to a specific item, and we needed to change it from a text item to a lookup item. Obviously (as per best practise, of course) this would need to be done in the development environment, and then released downstream. Given that this is a managed solution, I’d expect this to work, without any issues. Well, it didn’t…

The change in the development environment (deleted the old item, ‘re-created’ it as a lookup with the same system name) was done, we exported it as managed, and then went to import it in the UAT environment. It took the solution file, thought about it for a while (it’s somewhat of a large solution), & then errored:

Exception type: System.ServiceModel.FaultException`1[Microsoft.Xrm.Sdk.OrganizationServiceFault] Message: Attribute mdm_field is a String, but a Lookup type was specified.

Now I was somewhat confused by this message occurring. It’s not been the first time I’ve seen it over the years, but in my previous experience I’ve seen it when handling unmanaged solutions. It’s when you delete an item in the development environment, re-create it as a different item type (with the same underlying system name), and then deploy it as unmanaged. The solution import in the second environment fails due to the different in the type (as it sees the same name). This, of course, is to be expected.

But here we’ve been using managed solutions for deployment, and as mentioned above, they’re detractive as well. The expected behaviour (at least from my side of things) would be that the system would note that the item type has changed, remove the old item, & import the new item. In my mind, that’s logical, but apparently not?

See, even managed solutions have their limitations, of which this is one of them. Having checked with several other people who I reached out to around this, I’ve discovered that it can’t work in the way that I was expecting it to. Instead, a specific process has to be followed

  1. In the development environment, remove the item, & export the solution as managed
  2. In the downstream environment(s), deploy this (interim) managed solution. This will remove the item from the environments
  3. In the development environment, re-create the item with the different system type. Then export it as managed
  4. In the downstream environments, deploy this solution. This will then add the item (with the new system type) into the environment.

This means that development & deployment teams (if separate ones) need to co-ordinate around this, to ensure it’s done in the right way. It could also be developed/exported in succession, and then imported in succession as well (either manually, or through an Azure DevOps Pipeline, for example).

This worked wonderfully for us, and to be honest, I was quite relieved after several hours of frustration with things. Even better, it was a Friday, so meant that the week could end well!

Have you ever come across this, and been frustrated as well? Have you got a similar story with something else that happened to you around solutions? Drop a comment below – I’d love to hear!

Good news for Power Automate Flows!

As a starter for 10, this wasn’t actually the blog post that I was going to write today. In fact, the subject of the post wasn’t even going to be about Power Automate! However, there was some really amazing news that dropped today from Microsoft, which I just couldn’t pass up being able to talk about.

You’ve guessed it – it’s about Power Automate! Well, I suppose that the post title was somewhat of a giveaway, wasn’t it…ah well. So let’s go ahead and find out what this is all about then!

To date, we’ve been able to put Power Automate flows into a solution. Well, it wasn’t there exactly at the beginning of things, but it happened somewhere along the way. This was very convenient, as we didn’t then need to deploy each one individually to different environments. Some solutions can contain dozens & dozens of flows, and we really do love to package them all up together for ease of movement.

So that was good. But there was still a (major) ‘bugbear’ (as I like to refer to them as). This is the fact that after we deploy a Power Automate flow, we then need to go into it & (re)authenticate it. This is due to the fact that the connector/s that it uses contains what is referred to as a ‘secret’, and these can’t be moved across environments. As a result, we need to essentially recreate the ‘secret’ in the connector (ie authentication details) every time we move it. This is an annoyance (if you have one or two flows), and an absolute bloody nightmare if you have lots.

For the technical minded – every action in a flow is bound to a specific instance of a connection that it will use to “execute” that action. This is why when moving flows across environments, users are required to rebind every operation to a connection.

For example, I’ve been working with COVID-19 triage solutions. These contain lots of flows within them, connecting to multiple different sources, and doing different things. Every time we’ve performed a release (even if it’s just a simple update), we’ve needed to manually go through each flow, (re)authenticate them, and turn them on. If you forgot one, then everything can come crashing down & not work! But there’s been no other way to do it. To represent this visually, we have the following diagram

For each & every Power Automate, the connection line gets ‘broken’ when it’s deployed, and needs to be re-made.

Until now, that is. For today, Microsoft has announced the Public Preview for ‘Connection References’. Now when something is put into Preview, I usually caveat the usage of it with saying things like ‘it might go away, or not be released for a while’. But I’m going to be quietly confident about this particular piece of functionality, as I really don’t think it’s going to be pulled!

So what exactly are these? Well, in (mostly) simple terms, Connection References provide an ‘in-between’ or ‘abstraction’ layer for the connections that use them. Let’s show this visually as well

We still need to re-authenticate the Connection Reference once we deploy things. But let’s now see how we can save ourselves a massive headache, and LOTS of time:

Oooo…now this is looking better. Instead of having to update three Power Automate flows, we only have to update the SINGLE Connection Reference that’s sitting in the middle. Now multiple that by however many flows you have (eg sending emails out, etc), and start calculating how much time you’ll now be able to spend on coffee breaks, rather than doing this manually one at a time…

We can create Connection References directly from within the solution:

We then give it a name & description, choose which connector we’re going to be using, and either select an existing connection or set a new one up:

Once we’re finished, we click ‘Create’ at the bottom. Voila – we can now see it within our solution!

Note: Interestingly enough I couldn’t actually see this within the solution after I created it, even with the component selector set to show ‘All’. How I actually got them to display was changing the component selector to ‘Connection Reference’, and they then showed up. I’m thinking that this is due to it being new today/in the process of rolling out, and am expecting it to display without any issues in the near future

Let’s take a look at a Power Automate flow itself now to see how it’s referenced. When we open an item with a connector, we can now see the following:

We’re able to select the Connection Reference that we’re wanting to use. Simple, yet so powerful.

When importing a solution containing a Connection Reference, we will be prompted during the import process to set the actual connection that should be used with it:

If you don’t have any connections set up already in the environment, you’ll be able to create a new one from the dropdown.

Some things to note around this:

  • During the preview phase, Microsoft has specified that a single Connection Reference can only be used by up to 16 flows. This limitation will be removed once it goes GA
  • Existing flows will not be automatically upgraded. What you can do though is export the unmanaged solution, re-import it to the same environment, and then they will be automatically created for you. The flow/s can then be edited to update them to the correct connection reference record
  • The connection name and connection reference name are not currently synchronised. They can be different. Therefore it’s best to keep the naming conventions the same. Don’t set different names for connections and their associated connection references.

In summary – this is an awesome step forward with Power Automate functionality. I’m already tasking some of the developers on the team to re-do existing solutions to use it for ease of use. How do you think it’ll best benefit you? Drop a comment below!

Workflows & Managed Solutions

This is about some interesting behaviour around workflows & managed solutions, which I’ve recently discovered. Let me give a bit of background first.

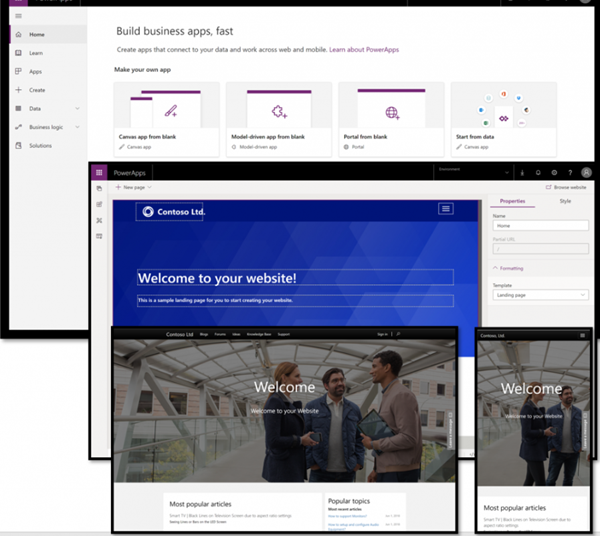
Currently I’m working on several COVID-19 apps for local authorities, to be able to help them assist people in need. As part of this, each local authority has a portal within the solution. The portal itself is a Power App Portal, and I haven’t really had exposure to them before.

blog.atwork.at | Hello, PowerApps Portals (and external users)!
Default portal view, not the one we implemented!

Installing a Power Apps Portal comes with quite a large number of solutions in order to get it to work. More on this below.

Due to the way in which we’re engaging with our clients, the solutions are built in a single tenancy (different environments, of course!). We’re then inviting the users in as guests through Azure Active Directory, to be able to access functionality etc. This works well – we don’t need to worry about managing user accounts, AAD permissions, etc. However it also means that we don’t have any Office 365 licenses within the environment itself.

Now we have workflows that are sending emails out around the portal – registrations, password resets, etc. These are being generated automatically by the system, but as there’s no Office 365 mailbox for the user, they’re queuing up.

It’s not possible to authenticate a mailbox belonging to an external user (we tried!), as the system needs a native (full) user with an active mailbox to be able to send out emails. This is of course unlike Power Automate, where you can create a Send Email action and use specified credentials for logging in to send an email.

So, we did what any normal system administrator/configurator would do. We opened up the relevant (managed) solution, and from there opened up the workflow that we needed to modify. Things looked normal at first – we deactivated the workflow, and started poking around it to see what made it tick.

We came across the part that actually took user credentials to send the email that was being generated, and modified this accordingly. Then we saved the workflow, which was successful. However, upon trying to then reactivate the workflow, we got the following error message (helpful, isn’t it!):

Nicely it gives the option to download the log file around the error. This can usually be quite helpful (at times), so we thought we’d take a look at it. Behold the following (I’ve had to shrink the screenshot to allow it to fit on the screen!):

Isn’t that ‘beautiful’. Don’t worry if you can’t actually make out the error information – none of it makes any sense, at least not in a practical sort of way.

Being stuck at this, I thought to reach out to one of the community Power App Portal champions, Mario Trueba. I’ve known him for a while, and he’s just simply amazing. Having asked if I could jump on a call with him for 15 minutes to diagnose (& hopefully find an answer!), we spent almost an hour!

He suggested trying to use the classic interface, as I had been doing all of this through the new UI. So off I went to open up Classic (I’ve missed this, I will freely admit). Through there, we opened up the solution, opened up the workflow, and re-activated it. Or not, as it happens – even through the Classic UI, we weren’t able to do so. We tried a variety of things, but to no avail. It just simply wasn’t happening!

I was slightly concerned that there was an underlying issues with Portals, perhaps from some legacy CafeX code. I had tried searching with Mario for error details contained within the log file, but we couldn’t find anything that would fix it.

The next morning on waking up & checking Twitter, I noticed someone tweeting around Portals, and engaged with them. They turned out to be on the Portals development team, and told me to shoot them over an email with the details, which I did. They then replied to me, saying that it wasn’t anything specific to Portals, and that I should raise a support ticket. That crossed one item off my list (a Portals issue), but I was still needing to get things resolved.

So I went off & raised a support ticket. A few hours later, a very nice tech support person called Siva gave me a call to discuss the issue. We hopped into Teams, and in what I can only describe as the SHORTEST period of time that I’ve ever experienced, the issue was resolved (it took 7 minutes in total. Yes, I know…). Don’t worry – I’m not going to leave you hanging here!

See, what the ‘issue’ (and I’m deliberately putting it in quotes) was turned out to be something quite simple, yet quite strange.

Essentially opening the workflow from the managed solution somehow (& I don’t know HOW) inherits the ‘managed’ property. This is whether we open it from the new UI, or the classic UI. As a result we’re able to deactivate it, but we CAN’T reactivate it due to the system thinking that we’re modifying a managed component (as an aside, it is interesting how I did manage to save it though?). This was what was causing things to fall over, and the error message was really not helpful at all.

It’s also not a matter of being a Microsoft (or ISV) managed solution. I’ve replicated this happening with a solution that I’ve built, exported as managed, & then imported.

So how did we do it? Well, there are two ways in which this can be dealt with:

Either we can go to System/Processes, find the workflow there, open it up, and then reactivate it:

Or we can open up the Default solution, navigate to processes, select the workflow, and then reactivate it:

Both methods work just fine, and as mentioned earlier on, I’ve since replicated this on workflows in other managed solutions.

To me, this is somewhat strange, and should work regardless. According to Siva, it’s the desired system behaviour, though I have no idea why someone should want it to work in one way, and not in another.

So if you’re reading this, and you might just happen to know someone in the necessary Microsoft engineering/development team who’d be able to answer this, could you point them my way? I’d love to engage them to find out why, how, and if they could pretty please change this?