I haven’t usually been putting up posts around the exams that I take. A few months back I did decide to write one on the MB-600 exam (MB-600 Solution Architect Exam), which just took off! It was quite amazing (& pleasing) how many people were looking at it, & asking me questions around the exam.
As a result, I’ve decided to continue this, and am therefore now writing this post on the MB-400 exam.
There are several different ‘ranges’ of exams within the Dynamics 365/Power Platform space. These are aimed at different types of roles, or specific specialisation/s within a role. A good example of this is the MB-2xx range. It covers functional technology, and is split across the different ‘main’ areas of Dynamics 365.
The MB-400 (the only one in the range at the moment) is aimed at developers. According to the official description for the exam:
Candidates for this exam are Developers who work with Microsoft Power Apps model-driven apps in Dynamics 365 to design, develop, secure, and extend a Dynamics 365 implementation. Candidates implement components of a solution that include application enhancements, custom user experience, system integrations, data conversions, custom process automation, and custom visualizations.
Candidates must have strong applied knowledge of Power Apps model-driven apps in Dynamics 365, including in-depth understanding of customization, configuration, integration, and extensibility, as well as boundaries and constraints. Candidates should have a basic understanding of DevOps practices for Power Apps model-driven apps in Dynamics 365. Candidates must expose, store, and report on data.
Candidates should have development experience that includes JavaScript, TypeScript, C#, HTML, .NET, Microsoft Azure, Office 365, RESTful Web Services, ASP.NET, and Power BI.
As anyone who knows me will attest, I am NOT a developer. However I decided (for several reasons) to give this one a go, and see what would happen! I knew I’d be pushing myself out of my comfort zone, there would be things I wouldn’t understand/know at ALL, but hey – I was curious to see what would happen! Even more challenging, I decided to book & take it within a 24 hour period!
Now as this has been out for a little while (& isn’t in Beta), there’s thankfully some good resources on Microsoft Learn about it. Take a look at https://docs.microsoft.com/en-us/learn/certifications/exams/mb-400, where there are several learning paths that can be followed.
A big shout out as well to Julian Sharp & Joe Griffin who recently ran a multi-week course around it. The official Microsoft learning paths are great of course, but seem to miss out quite a bit of what’s actually needed to be known for this. The course that they ran covered a lot more. Hopefully there will be more courses like this run in the future!
When passing it (& assuming that you’ve passed the MB-200 as well), you get a lovely shiny badge!
I’m SO proud of this!
Once again, I sat the exam through the proctored option (ie from home). The experience went somewhat better than previous times. Amusingly I got told off by the proctor during the exam for ‘looking down at the keyboard’, rather than looking at the screen! I explained that I was using a different computer, & kept clicking the wrong mouse button on it (leaving aside that I was exhausted when doing it!).
So, as before, it’s not permitted to share any of the exam questions. This is in the rules/acceptance for taking the exam. I’ve therefore put an overview of the sorts of questions that came up during my exam. (Note: exams are composed from question banks, so there could be many things that weren’t included in my exam, but could be included for someone else!).
Configuring security for system connections (security types)
D365 Web API – how it’s used, types of calls made from/to it
Azure API – making calls to/from it
Code for importing data (debugging, variables)
Advanced Find
Types of calls (synchronous, asynchronous, )
Data modelling
Creating & deploying solutions through different methods
Publisher versioning
Identifying code variables, and saying what would happen in given scenarios
Power Apps Component Framework (PCF) – how to use, how to package components, how to deploy
PCF components & classes
JavaScript – code examples, what happens when a given scenario happens
JavaScript functions
Dynamics 365 Ribbon – what it is, what you can do with it, different types of functionality & ways to do things with it
Security & Permissions, including roles, teams, field level security, business units
Workflows, Power Automate Flows (how they’re set up, different functionality within them, how to do things with them given a specific scenario)
Business Rules (what they can/can’t do, different scopes, etc)
Field types (eg option-sets, calculated fields, roll-up fields, multi-select, etc)
Importing solutions – requirements for this, versioning, deployment between environments
Compatibility with Microsoft Teams
Now many of these (as I said above) are outside of my comfort zone. In fact, I’d say that even with absolutely cramming for a whole day for the exam, I still felt that I was guessing the answer for at least 30% of the questions. Admittedly though, as Julian Sharp says, a ‘gut feeling’ answer is usually right most of the time, coming from what the subconscious has absorbed during revision.
I was REALLY happy that I got a passing mark for this, & admittedly was VERY relieved as well. So now another lovely shiny badge in my collection, and I’m now going to go and update it on LinkedIn as well!
If you have any questions on this, feel free to drop them below, and I’ll try to help out as best as I can!
Many people in the IT scene will know of LogMeIn (https://www.logmein.com/), or LMI for short. For as long as I can remember (which means going back almost 2 decades!) they’ve been one of the main remote access solutions. With their product range, it was possible to leave your computer at home, travel abroad, and easily log into it from practically any computer anywhere.
It’s also a great product for IT professionals. Being able to deliver customer support through remote sessions, manage identity solutions, etc. The number of products over the years has grown, and been quite pleasing to watch:
Pro handles unattended remote access for up to 10 computers, and is aimed at small businesses
Central takes this up to the next level, covering 250 computers, but has all of the admin features that larger businesses want
Of course, LogMeIn Free (a great starter product for personal usage) was removed some years back, which to this I still believe is a great pity. Obviously the company decided to focus on the more enterprise side of things, which I can understand as a business.
So, why am I now writing about them? Quite simple, actually. LogMeIn are one of the providers that are working with Microsoft to provide Co-Browse solutions for Omnichannel! It’s a very new piece of functionality that’s been launched in the Dynamics 365 product, and there aren’t many providers out there that have integration points to it.
What is Co-Browse?
It’s important to understand what co-browsing is, and some useful stats:
“Co-browsing” refers to the ability to have a service provider & customer jointly navigate an application in real time through the web.
Co-browsing: The Gateway to Happy Customers & Better Financial Results, 2015
So co-browsing is useful. But just how useful can it actually be? Well, apparently it can be VITAL:
Co-browse has the potential to bridge the gap between human & AI-driven customer interaction, & to enable organisations to differentiate their customer service.
By 2022, co-browsing will be used in 2% of customer service interactions, up from 0.1% in 2017 (2000% growth).
Gartner 2017: How Co-browsing Can Differentiate Your Customer Service
LogMeIn has had their Rescue offering available on the general market for a while as a standalone product (alongside the rest of their offerings). They’ve now build it out into a new standalone product called Rescue Live Guide, and provided an integration into Omnichannel for Dynamics 365. Customers obviously need to have licenses for the product, but with these, they now have the ability to co-browse during support sessions. Not only can they see what’s going on, but they can also interact with the customer browser itself, providing an even better support experience.
So, let’s go ahead and take a look at how to set it up, the experience itself, and my thoughts on things.
Setup
When I first started testing out the LogMeIn offering, I had to go through a manual install process. This was due to the product just being released (in May 2020), but wasn’t actually that difficult to carry out.
However, they were in the process of switching over to an automatic installation through AppSource, as most of the other apps have. It’s great to be able to see that this has gone live, and is now available for users – it really does make the install that much easier!
Clicking ‘Get It Now’ takes you through the usual route of installing a solution from AppSource: selecting the environment, confirming the installation, etc. After around 5 minutes, I can now see the following:
Once it’s installed, we’ll need to set it as the co-browse provider for the channel that we’re wanting it for. To do this, open the chat record, go to Conversation Options, and select it there:
We’ll also need to put in two records for the LogMeIn co-browse configuration:
Finally, there’s a script block that needs to be added to the webpage where the chat widget is located. This enables the LogMeIn co-browsing ability from the customer side. It can be added right under the chat widget code itself; in the fullness of time, this may be able to be auto-generated as part of the chat widget code, but it’s not at the moment (this is dependent on Microsoft being able to offer it):
Right – setup all done, but before we see it in action, let’s take a quick look at the Rescue Live Guide admin console side of things.
Rescue Live Guide Admin Console
Although the functionality is within Omnichannel for Dynamics 365, administering agent licenses and groups takes places within the Rescue Live Guide admin console at https://console.logmeinrescue.com/admin. As companies will need to have Rescue Live Guide licenses, they would usually be familiar with this.
There’s the ability to create new users or groups, and manage them as well:
It’s also possible to set the names that are used for the agent & customer. These can be either the actual name of the agent, or instead potentially a job role/title:
I’m not going to go further into the admin functionality here – documentation can be found on the Rescue Live Guide site around this. Let’s instead take a look at the experience within Omnichannel, which after all is what we’re here to see!
Agent Experience
So how does this actually work, in practise? Well, from the customer side, they start a chat like they would usually do. When the agent responds, they’re given an option for ‘Live Guide’:
When the agent clicks on this, two things happen:
Firstly, there’s a URL that’s posted in the chat. This contains a link for the customer to click, with an auto-generated ID number
The agent is taken to the LogMeIn Rescue site page in a new tab.
Note: At the moment, the agent will have to sign in manually. LogMeIn have told me that their roadmap includes Single Sign On, so that after the initial setup they’ll be signed in automatically, and not have to perform this step in the future.
Once logged in, the agent will see that the session is ready, & waiting for the customer to connect to it. Once the customer has clicked the URL provided in the chat, it will open the Rescue Live Guide session, and authorise the agent to co-browse with them. They’ll then see the following prompt. This tells them that the session is connected to the agent, and that they can begin:
Once the customer has accepted to start browsing together with the agent, they get some small extra items appearing on their screen:
They can see that there is indeed a shared browsing session happening
They can also see where the agent’s mouse cursor is pointing to (by default, without the agent actually doing anything)
It’s important to note that that the co-browse session is taking place within the specific browser (tab) that is open. Therefore if the user navigates away, the session is paused until they navigate back to it.
On the agent’s side, they can view the customers browser. They can only see what’s happening in the actual tab that’s open for the co-browse session (see below for some more information around this though). It’s quite similar to the customer’s side, though has some LogMeIn features available. Well, obviously it’s similar to the customer – the agent is seeing the customer’s browser window!
They can of course still access the Omnichannel chat itself, and send information through that as well if they wish to.
Just as the customer can see the agent’s mouse position, the agent can see the customer’s mouse position. There are also gesture indicators so that each person can see what the other clicks etc as well, which can be really helpful when walking through a process.
The functionality currently available to the agents covers scrolling (within the page), highlighting, drawing and ‘virtual tabs’. As shown in the image above, the agent is able to highlight text/images, which will then be displayed as being highlighted to the customer. Agents are also able to enter text into text fields, click on buttons, and interact with the native webpage functionality.
Note: The Rescue Live Guide admin centre provides granular controls around these, so that customers can allow agents certain rights, rather than allow them to do everything.
The agent is also able to ‘draw’ on the webpage to be able to point something out, highlight a part of the page, etc.
Note: These annotations will disappear once the customer or agent starts scrolling up/down the page again.
As I’ve mentioned above, the session is taking place within a single browser tab. If the user nagivates away (to a different tab), the session is paused. The agent isn’t able to see any other tabs. So what happens if we do indeed need to open a new tab for something?
Well, there’s a really nice feature that the agent is able to use for this. It’s sort of a ‘virtual tab’ within the browser tab. Sounds interesting!
The customer is able to see this, and can navigate between the tabs. They’re now also able to open a new virtual tab themselves (which is an update to the functionality – originally they weren’t able to, and had to request the agent to do it).
Customer view of the support session
If the customer wants to pause or stop the session, the user simply has to click the ‘Stop’ button in the bottom left. They’ll then be presented with the following screen:
Whilst the session is paused, the customer can continue to use their machine as normal, but the agent won’t be able to see what’s going on. Only if the customer allows the session to resume by clicking ‘Continue Browsing’ will the agent be able to see the customer’s browser once again.
Alternatively, the agent can end the support session themselves, and the customer will be notified about this.
Suffice it to say that LogMeIn have been a market leader for many years in this sector, and I’m happy that sessions through their products are adequately encrypted & protected.
Other functionality
Apart from the above, which is obviously the core of the product, there’s other functionality that’s possible to enable through the LogMeIn Rescue console:
Session recordings. It’s possible to record these for playback, which is then available from the LogMeIn portal. All recordings are carried out from the agent’s viewpoint, not the customers – there is therefore no issue that sensitive information from the customers side could be seen
Data masking. It’s possible to use data masking to hide sensitive information. At the moment the setup for this is a very manual process, so I’m not going to go into how to set it up it here. Having played with it a little, it’s really quite useful. Agents can’t see sensitive information on their screen, and if a customer needs to enter/update information, the session pauses whilst this is being done. However I understand that part of the LogMeIn roadmap for the near future is to make the setup process much more user friendly. When this is released & available, I’m planning to do a post on this
Reporting happens through the LogMeIn portal (see my thoughts below on this). It looks nice, and can be downloaded as a CSV file. Again, the functionality of this is going to be expanded in the near future.
Reporting in the LogMeIn website console
My thoughts
Having gone through testing out the product, I think that LogMeIn has brought a really great product of theirs into the Omnichannel experience. I used to use their products regularly (I ran an IT MSP some years back, in which we used LogMeIn products as well), and always found that they behaved well.
Now having the ability for agents to not only see, but also interact with the customer browsing experience really does take things to the next level. Audio and/or video support is great of course, but sometimes being able to see what the customer is seeing in their browser results in a much quicker resolution. This of course results in happy customers, which is what we’re striving to achieve!
As I’ve said above, I’ve used LogMeIn over the years, and always found their products to be pretty much amazing. With Rescue Live Guide, there are several differentiators that the solution brings to market:
For the standalone solution of Rescue Live Guide dedicated web resources aren’t needed. It’s an easy solution to set up, and for the customer to engage with – all it requires is a URL to be provided to them to get the session going. Obviously, as mentioned above, there is some slight coding needed for the Omnichannel integration, but this is really minor. Any company having Omnichannel installed/configured will already have power users/admin familiar with what’s needed for this, so it’s a very small additional step
It’s possible to co-browse on any website that the customer wants to, not just a single specific website. Once the co-browse session is active, the customer can change to any other website, as long as they do so within the co-browse session tab. Most other co-browse solutions out there can’t do this, so this is a really strong point in favour of this solution.
The data masking is really cool, and for most customers, will be a ‘must have’ rather than ‘nice to have’. I’m looking forward to when the setup for this is updated to be more business-user friendly, and will then do a separate blog post around it, together with a video!
A few things that I think would be nice to have:
The agent is already able to draw on a webpage during the co-browse session, and select different colours for this. It would be great if the agent could also type text in to display on the screen (not in a specific field) in colour. Sometimes being able to see an example written in front of you (without it going into the actual field) can be quite handy.
Being able to transfer the co-browse session to another agent. This could be either another Omnichannel agent, or a separate specialist team. It is of course possible to transfer the chat session to another Omnichannel agent, but then they’d have to start the whole co-browse session again (with a new PIN, etc)
Reporting (for the most part) all occurs in LogMeIn at the moment, as Dynamics 365 only has very limited reporting on this natively. However I understand that this is due to change at some point this year, with the ability to report properly on it within Dynamics 365 itself.
At the point when new items do get released, I’ll be aiming to do a review of them, and add to the knowledge around the product.
So, with all of that, how do you think this could best help you & your customers? Please comment below – I’d love to hear!
Recently I’ve been doing a LOT of work with canvas apps. As I think I’ve mentioned before (at least once or twice!) my background is the traditional ‘model’ style app. As a result, it’s been quite a steep curve to skill up, but I think I’m handling it alright. I’m (slowly) getting used to the way that canvas apps work, the ability to put different controls on the screens, and reference each other.
Heck, I’m even starting to play with more advanced navigation concepts, based on some REALLY great ideas that I’ve seen (Clarissa, I can’t say how grateful I am to you for all of your assistance & guidance!).
Amongst all of this incredible & wonderous journey, I’ve also been learning some code. Yup – you heard me correctly! I’ve always said that I’m not a developer – I respect them greatly, but I don’t develop code.
True, I’ve picked up some SQL here & there, and will freely admit that running SQL queries against the Dynamics 365 database is SO much more powerful than running an Advanced Find. Of course, it’s necessary to know the joins, conditions & such. Redgate’s SQL Helper has been amazing along the way. With moving to cloud systems, things got a little more….complicated. XrmToolBox has the SQL4CDS tool which I’ve used several times, but I was really excited by the recent announcement/release of being able to (properly) run SQL commands against the CDS database from SQL Management Studio….
Anyhow, I’m digressing. So, I’ve been needing to learn canvas app style code. It’s like Excel commands, though (slightly) different at times. Things don’t always make sense (to me, at least) – I STILL haven’t figured out why some expressions need to be in a certain order. After all, according to mathematical principles it doesn’t matter if you write A>B, or B<A. Going to still need to wrap my mind around all of this.
In short, Patch allows you to set record values from places other than a form table to the data that you’re saving. It also allows you to save field values that aren’t available on the canvas form table (due to limitations). I’ve referred to this previously at https://thecrm.ninja/canvas-app-record-set-regarding-field/. The scenario that I talk about there is just one of the things that can be done in this way. Since that post, we’ve come a long way, and are doing most things with Patch statements (due to the scenario requirements).
So that’s all well & good. However, there IS actually a reason for me writing this blog post….crazy, right? And it’s not to waffle on and on about patch statements. It’s about a very specific scenario that we hadn’t come across to date, but that came up last week.
Now, obviously you’re now VERY interested in hearing all about it, and learning for your own situations. I mean, otherwise you wouldn’t have stuck with me through this article for so long. So, let me set out what happened.
As mentioned above, we’re mostly using patch statements throughout this specific app. That’s….quite a lot of patch statements (especially as we also have IF statements governing which one is being used, as it’s not possible to use IF inside a patch statement, but I’m digress…). I’d say we’re pretty familiar with this now.
However, even with being familiar with it, we suddenly had a problem. One of the forms that we’re saving down started to NOT save down. Records weren’t being saved, which obviously is a problem!
Bear in mind here that we hadn’t touched the code for this specific action for a few weeks. Nothing had changed in our code, and nothing had changed from a platform perspective (ie Microsoft hadn’t changed any of the underlying functionality.
Going into the statement, we immediately started testing it out, and saw something interesting. We were getting an error that a required field could not be NULL:
This was quite puzzling – although in a model app we can set fields as required, and users can’t save the record until they populate it, this isn’t true in a canvas app (well, when using Patch, at least). See, it’s technically possible to use a Patch statement to create/update a record, but you don’t have to pass in required field (values). It’s a sort of workaround (& can be used in some scenarios for benefit, actually). So this happening all of a sudden was quite strange to us.
It was even stranger as we hadn’t been using the field on the form at all. The field that was being referred to was being used for a totally different process, in a different team, & not surfaced into the canvas app at all. This really was causing us to scratch our heads, and try to think (more) out of the box. It didn’t seem to be the code (we could set a value in code, but didn’t want to as it wasn’t relevant), yet we weren’t able to ignore it. Really frustrating!
With all of this in mind, I decided to go back to absolute basics after a few hours of troubleshooting. The field that seemed to be causing all of these issues was a relatively new addition, so I checked all of the details around it:
Was the field type correct for what it should be? Yes
Was it set as required on the CDS field definition? No (not that I thought this would help, but still checked)
Was the field on the entity form? Yes
Was the field set as required on the entity form? No (again, I didn’t think I’d get any joy from this)
Hold on….on the form designer it’s not set as Required. But when I open the form, and put some values in, suddenly it IS required.
Aha! OK – I’m now starting to see some light shining on this. I headed over to Business Rules to check out what might be there. Lo & behold, there was a business rule that set the field as required (when certain conditions were filled). An example of this would be:
Now this field hadn’t been in place when the code was developed (as mentioned above) – it had come in since. I was very curious if a Business Rule could require canvas apps to set the value, and so did some testing.
Disabling the business rule removed the error from the patch statement. Re-enabling it caused the issue again. OK – so we’ve found what’s been causing this, and could put in an adequate solution to handle it.
So in short, if you’re setting a field as being required through a Business Rule, you’re going to need to address it in any canvas app as well (that’s saving data down to the same form that it’s appearing on). Why it actually happens, when just setting it as Required on the form doesn’t, I have NO idea.
But it’s a good concept to keep in the back of your mind, I believe. Especially if there are multiple people working on developing a single entity, as otherwise you could find yourself in exactly the same scenario that we did!
Have you come across anything like this, or a different piece of strange behaviour? Comment below – I’d love to hear about i!
Recently I’ve been expanding my knowledge of Power Automate, and how it works. It really is a truly amazing tool, though there can be some quirks to things! There are so many connectors to use, though I haven’t really used that many of them to date.
Truthfully, most of my work in Power Automate is around CDS & Office 365. Occasionally I’ll dip into another system, but for the most part that keeps me busy enough. It’s not to say I don’t want to explore further, but finding the time can be quite difficult!
One of the great abilities that Power Automate has is to be able to update a record. With focusing on CDS entities for the moment, we would use the inbuilt action for this:
We’d run a query to get a specific record – this would give us the record ID (or GUID, depending on your preference). With this, we’d use the Update Record action & pass in the record GUID. After all, we need to know which record we’re going to update! So for example:
What we can then do is set values for the record. So we can pass in Dynamics Content, use Expressions, etc. These can be from records that are part of our Power Automate query chain, or from elsewhere.
For example, I can say that when a contact’s postcode changes (or zip code for USA), go away, look up the new city, and update it (Note: I haven’t shown the postcode lookup part below):
So this is all really brilliant. Different fields have different behaviours, of course, and we need to respect that. Otherwise the Power Automate flow won’t run, and will error. This is, of course, the digital equivalent of not trying to force a square brick into a round hole!
What we can also do is clear a field value. If for example we’re wanting to remove a value from a field, we can use the NULL expression on the field. When the Power Automate flow runs, it’ll clear whichever value the field is currently holding:
Now, one of the the field types available within CDS is the lookup field. I’m not going to go into what this is, as we should already know this!. We can, of course, set lookup fields values to populate the field, which works as expected.
However (& thanks for bearing with me so far), what happens if we want to clear a lookup field value?
Say for example that we have a task, that’s assigned out to someone. If they reject the task, we want to be able to remove them from the task record. We wouldn’t delete the task, as we still need it (& now would need to assign it to someone else). We need a way to do this.
I can hear what you’re thinking right now – mentioned above is the use of NULL, so we’d use this! Um…well, you’d think so. You can try that, but we’ve found that doesn’t always work. Additionally, that doesn’t actually seem to remove the underlying relationship that’s been put in place.
Update: Thanks to Lin Zaw Winn, who dropped me a line to let me know further information around this. The standard CDS connector (the first one that was available) allowed this to work, but the updated CDS connector (Current Environment) doesn’t allow it. Unfortunately the different connectors aren’t at parity, which is a pity!
So, there’s another way to clear lookup field values. This involves the Unrelate action that’s also available. The steps for this are as follows:
Get the related record (lookup the record type, pass in the GUID for it)
Use the Unrelate action to remove the connection
This will then remove the relationship, which actually results in clearing the lookup field value. In practise (for our scenario), this would look like:
Let’s take a bit of a further look at the options available here:
The Relationship field is the relationship between the two entities (eg here it’s Contact & Task). Thankfully you don’t need to manually type this – it’s easily selected from a dropdown list.
The URL field is the linked record itself
Note: It’s VERY important to have the Entity Name & URL values in the right order. I’d suggest looking up the connected record first (ie what the lookup field is pointing to), and using that as the Entity Name value. You’d then select the record where the lookup is saved on as the URL value.
What I’d usually suggest as best practise is to have a condition before this takes place. As mentioned earlier, removing the lookup would happen on a record update. This is because you wouldn’t be removing a field value if you’re creating the record!
But you’re not always going to want it removed. In the scenario that I’ve been dealing with, we’re only wanting to remove the volunteer if they’ve rejected the assigned task. So our Power Automate flow is set out like this:
When Task record is updated
Filtering on the field for ‘Task Accepted’, as we could have other things being updated on the Task record that we don’t want to trigger this particular process
Condition to check the ‘Task Accepted’ field value
When it’s something other than ‘Rejected’, cancel the flow
When it’s ‘Rejected’, run the Unrelate process set out above, and stop flow
You can obviously build out other functionality within it as you so desire.
So with this in mind, how do you think you could benefit from this? Drop a comment below – I’d love to hear!
Recently we’ve been rapid producing & deploying solutions, due to the current pandemic. One of the apps that I’ve been working on required quite a few fields for data capture. Well, truthfully most apps require quite a few fields, but I thought that I’d talk about this one in particular, due to something that I discovered.
Now, we all know how to create fields in the Power Platform maker experience. It’s really quite simple – you select that you want to add a new field, put in the details/type of field, & save. Hey voila – you have yourself a nice new field! You can then go on to add it to forms, views, etc etc. We all know how it’s done:
What I’ve found myself doing recently though is not to create fields through the Maker interface (make.powerapps.com), especially when there are lots of fields to create. Instead, I’ve been using the XrmToolBox to do this. There’s a very helpful tool within it called Attribute Editor, which allows you to use an Excel spreadsheet. It takes this, and creates the relevant fields through the Dynamics 365 API.
One of the reasons for doing things this way was that it allows me to get on with other things whilst the fields are being created. Although it doesn’t happen in the blink of an eye (especially when there are a lot of fields to create), I can leave it whizzing along, and do something else. This, of course, makes me feel VERY productive!
Right – back to what I was saying. So I had a lot of fields to create, and many of them needed to be datetime fields. Actually, all I needed was the time component, but unfortunately Dynamics 365 DOESN’T allow you to just show the time. It’s either Date, or DateTime, but no option for JUST Time. A flaw, in my opinion, for what it’s worth….
So I created the Excel template, started the process, and went on to do something else. I of course made sure to specify that the field type should be ‘DateTime’.
Coming back to it when it had finished, I started to place fields on forms, and noticed something strange. All of the datetime fields that I had created through this were date ONLY. This was…puzzling! Going to check the fields themselves, they were set as Date ONLY, not DateTime!
I went back to check my upload spreadsheet, and it was set correctly there. I even tried uploading another field, but still the same issue was occurring.
Now, with the way that Dynamics 365/Power Platform works, once you’ve created a field & saved it, you can’t change the field type. When it’s created it’s saved down to the underlying database structure as the specified field type, and that’s it. No way to change it…or at least not through the front end!
With this in mind, I fired up another one of the XrmToolBox tools, namely Attribute Manager. What this handy tool does is, behind the scenes, allow you to change the field type. Well, it doesn’t ACTUALLY change it directly – it clones it, deletes the original, then clones it back. There are some caveats to it working properly (ie that the field isn’t used in a view somewhere, for instance), but it’s really helpful.
Note: It only works for custom created fields, not the default OOB fields!
Depending on the field type that you’re wanting to change it to, you can select different options. However for DateTime, there’s only one option. OK – I was going to see what happened.
Well, I ran the update, but nothing changed. It was still ‘Date’ only within the interface, which was really being incredibly annoying. It wasn’t as if I could just delete & recreate it (well, I could, of course). I had dozens & dozens of these to do, and quite frankly didn’t want to spend all of that time in doing this.
Thankfully (with the help of one of my colleagues, who’s an experienced & devoted developer – thanks Sid!), we found the solution.
See, I had been doing everything within the ‘new’ interface. This is the one that Microsoft keeps pushing everyone to, as they don’t want people to really be using the Classic Interface anymore. That’s all very well & good, but the ‘new’ interface isn’t on parity (for some things).
Reverting back to the Classic interface (note that the option below is only available when working within a solution!), we discovered some hidden behaviour
We located the entity that we needed, and the field itself, and opened it in Classic. With the screen that’s presented (I do miss this in some ways – I remember the days where I almost lived permanently in here!) we AMAZINGLY have the following option:
We can CHANGE THE TYPE!! Now, this is just with the field that we’ve selected. To be frank, I have no idea at this point about any other field types, and would need to explore that separately. But for the moment, my problem has been solved! (well, to the point that I have ‘time’ values available – I’d still like to see JUST time values being an option).
So with this in mind, I merrily waded through the dozens of fields in the Classic UI, changing them all as needed. It wasn’t just a few minutes of work, but it was definitely much less time that deleting & manually creating each one!
So, really quite helpful. The only other thoughts that I had around things were that it would be nice if the various tools within the XrmToolBox could do this as well. However, the fact that they don’t seem able to actually seems to be a limitation of the API. Having gone to check the different field types & how they’re set programmatically (https://docs.microsoft.com/en-us/powerapps/maker/common-data-service/types-of-fields), I’ve noticed the following:
There really doesn’t seem to be any way to specify the different sub-type, which is a shame!
Have you ever had a similar situation with fields? Drop a comment below- I’d love to hear about it.
This is about some interesting behaviour around workflows & managed solutions, which I’ve recently discovered. Let me give a bit of background first.
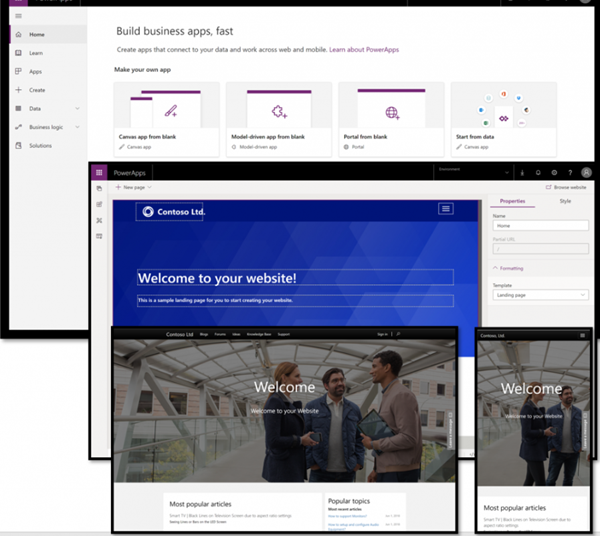
Currently I’m working on several COVID-19 apps for local authorities, to be able to help them assist people in need. As part of this, each local authority has a portal within the solution. The portal itself is a Power App Portal, and I haven’t really had exposure to them before.
Default portal view, not the one we implemented!
Installing a Power Apps Portal comes with quite a large number of solutions in order to get it to work. More on this below.
Due to the way in which we’re engaging with our clients, the solutions are built in a single tenancy (different environments, of course!). We’re then inviting the users in as guests through Azure Active Directory, to be able to access functionality etc. This works well – we don’t need to worry about managing user accounts, AAD permissions, etc. However it also means that we don’t have any Office 365 licenses within the environment itself.
Now we have workflows that are sending emails out around the portal – registrations, password resets, etc. These are being generated automatically by the system, but as there’s no Office 365 mailbox for the user, they’re queuing up.
It’s not possible to authenticate a mailbox belonging to an external user (we tried!), as the system needs a native (full) user with an active mailbox to be able to send out emails. This is of course unlike Power Automate, where you can create a Send Email action and use specified credentials for logging in to send an email.
So, we did what any normal system administrator/configurator would do. We opened up the relevant (managed) solution, and from there opened up the workflow that we needed to modify. Things looked normal at first – we deactivated the workflow, and started poking around it to see what made it tick.
We came across the part that actually took user credentials to send the email that was being generated, and modified this accordingly. Then we saved the workflow, which was successful. However, upon trying to then reactivate the workflow, we got the following error message (helpful, isn’t it!):
Nicely it gives the option to download the log file around the error. This can usually be quite helpful (at times), so we thought we’d take a look at it. Behold the following (I’ve had to shrink the screenshot to allow it to fit on the screen!):
Isn’t that ‘beautiful’. Don’t worry if you can’t actually make out the error information – none of it makes any sense, at least not in a practical sort of way.
Being stuck at this, I thought to reach out to one of the community Power App Portal champions, Mario Trueba. I’ve known him for a while, and he’s just simply amazing. Having asked if I could jump on a call with him for 15 minutes to diagnose (& hopefully find an answer!), we spent almost an hour!
He suggested trying to use the classic interface, as I had been doing all of this through the new UI. So off I went to open up Classic (I’ve missed this, I will freely admit). Through there, we opened up the solution, opened up the workflow, and re-activated it. Or not, as it happens – even through the Classic UI, we weren’t able to do so. We tried a variety of things, but to no avail. It just simply wasn’t happening!
I was slightly concerned that there was an underlying issues with Portals, perhaps from some legacy CafeX code. I had tried searching with Mario for error details contained within the log file, but we couldn’t find anything that would fix it.
The next morning on waking up & checking Twitter, I noticed someone tweeting around Portals, and engaged with them. They turned out to be on the Portals development team, and told me to shoot them over an email with the details, which I did. They then replied to me, saying that it wasn’t anything specific to Portals, and that I should raise a support ticket. That crossed one item off my list (a Portals issue), but I was still needing to get things resolved.
So I went off & raised a support ticket. A few hours later, a very nice tech support person called Siva gave me a call to discuss the issue. We hopped into Teams, and in what I can only describe as the SHORTEST period of time that I’ve ever experienced, the issue was resolved (it took 7 minutes in total. Yes, I know…). Don’t worry – I’m not going to leave you hanging here!
See, what the ‘issue’ (and I’m deliberately putting it in quotes) was turned out to be something quite simple, yet quite strange.
Essentially opening the workflow from the managed solution somehow (& I don’t know HOW) inherits the ‘managed’ property. This is whether we open it from the new UI, or the classic UI. As a result we’re able to deactivate it, but we CAN’T reactivate it due to the system thinking that we’re modifying a managed component (as an aside, it is interesting how I did manage to save it though?). This was what was causing things to fall over, and the error message was really not helpful at all.
It’s also not a matter of being a Microsoft (or ISV) managed solution. I’ve replicated this happening with a solution that I’ve built, exported as managed, & then imported.
So how did we do it? Well, there are two ways in which this can be dealt with:
Either we can go to System/Processes, find the workflow there, open it up, and then reactivate it:
Or we can open up the Default solution, navigate to processes, select the workflow, and then reactivate it:
Both methods work just fine, and as mentioned earlier on, I’ve since replicated this on workflows in other managed solutions.
To me, this is somewhat strange, and should work regardless. According to Siva, it’s the desired system behaviour, though I have no idea why someone should want it to work in one way, and not in another.
So if you’re reading this, and you might just happen to know someone in the necessary Microsoft engineering/development team who’d be able to answer this, could you point them my way? I’d love to engage them to find out why, how, and if they could pretty please change this?
I decided to write this post due to currently looking at the Connections entity. This is for a current project with a very specific purpose. When this came up, my thoughts went back to a previous project some years back when we also looked to use the Connections entity. I therefore thought that it would be good to recap & share my experience.
What are Connections?
Now, the Connections entity truly is a wonderful piece of work. It’s one of the core features that doesn’t actually get much time or effort devoted to it! However, it underpins a lot of the way that Dynamics 365 has been built to work over time.
The best way to summarise Connections is:
Connections are a very easy way to connections records without needing to have to create a custom relationship in the system. Connections can be used between records from the same entity, or from different entities.
See, you are able to connect one record to another record within the system. This could be account to account, account to contact, or contact to a custom entity. There are practically no limits, apart from the extent of your mind! All of this is done by leveraging the functionality that Connections brings to the table.
Note that I’m not talking about lookup fields here, which are also great, but work differently, and require creating a relationship between entities (or even within the same entity).
Just a quick reminder here that custom entities need to be enabled for connections – it doesn’t happen as standard when creating them. You can either do this when creating it, or you can edit the settings for it later:
How to use Connections
In order to connect one record to another, you need to open the first record & click the Connect button on the toolbar:
You’ll then be presented with the New Connection screen, where you’ll select the record that you want. Click the ‘All Records’ item at the top & then ‘Change View’ to select the actual entity that you’re wanting to look for:
You then select the record that you’re wanting, and save. Hey presto, the two records are now connected! To see the connected records, look at the associated ‘Connections’ setting from either record:
OK, so this is really all brilliant. For the absolute majority of situations, it works, and works well. There’s nothing better for it. There are a few small issues, such as the fact that you can’t use Business Process Flows or Business Rules for custom logic, but instead need to use Javascript, but for the most part they work well.
Edge case scenarios & issues
However, there are some edge case scenarios that I’ve come up against, which is the whole purpose for writing this blog post.
What happens if you’re trying to use Connections to establish a hierarchy of records. Eg one record is a parent of another record. Well, you could use a lookup field instead, but if you wanted to define specific attributes for the actual relationship, that wouldn’t work.
Here’s the scenario. You’re needing to capture the relationship between different people, along with certain attributes (eg if they’re a legal guardian, or a trustee, or have power of attorney, etc). You’d think that Connections would work brilliantly for this. After all, you can modify the actual Connections entity to add custom fields onto it. So for example, you could have something like the following:
Note: I’m not referencing Connection Roles, as you can only have a single connection role per connection. In the scenarios I’m handling, I’m needing to have multiple attributes per connection.
So you create the connection between the two records, and you set the attributes that you require. All good. What’s also good to remember is that Connections are bi-directional. You can view them from either ‘side’ of the connection. Eg:
Record 1
Record 2
That’s actually really helpful & useful in the normal scheme of things. You can easily see connections from either side.
But there’s a catch, or even (in our case above), an issue. If we open up each of the two Connection records, we’ll see the following data.
Joe Bloggs connecting to Helen Sommers:
Helen Sommers connecting to Joe Bloggs:
Can you spot the issue? Of course you can! On BOTH of the connection records, the custom fields that we set have the same values. We originally connected Joe Bloggs to Helen Sommers as the Legal Guardian, Power of Attorney & Trustee. Well, if we open up the connection record from Helen Sommers, we’re seeing the same values set, just in the opposite direction!
This is actually due to how Connections work. When you create a connection Record A to Record B, the system automatically creates a mirror Connection record from Record B to Record A. When it does this, it copies all of the values that you’ve set over to this mirror record.
So when you look at the data, you can’t actually see how the structure should work. It’s an issue. Especially if you’re passing the data to other system/s that may need to evaluate it. They just can’t understand this properly, and you’ll get some VERY unwanted results out of this.
Now, there is actually a field within Connections that shows which record is the ‘master’ (ie the one you actually created), and which one is the ‘mirror’ that the system created:
However even with this in place, we’ve found issues when using it:
If you’re relying on people looking at the record to see the information, they’re going to make mistakes (ie not checking this value). With the fact that the values are also displayed on the mirror record, this is very prone to user error, and isn’t a good way to do things
If passing information to another system (ie the record & the values), you need to program it to only allow it to pass records with this flag set correctly. If the other system is writing back data, it also needs to be configured to write back to the same record.
Summary
With all of this in mind (& especially considering that users may create connections from the ‘wrong direction’, which is quite possible to happen), it’s important to think of the best way to architect systems for regulatory purposes. Financial, legal & other judicatory requirements need to have a system that can handle them properly & accordingly, and not leave room for error.
Therefore, if you’re looking to handle these sorts of scenarios, I’d recommend to look at implementing a custom entity for those specific connections.
Another benefit of this is to separate out these connections from the general connections entity. That way, you’ll also be able to handle security appropriately, which is usually applicable in these sorts of situations. It will allow you to easily allow only a subset of users access (read and/or write) to this data, rather than trying to apply it to Connections (which is going to be a major headache!)
Today I want to share with you something that I’ve realised. Changing field labels can have unintended consequences!
Let’s cast our minds back to the days of ‘traditional’ Microsoft CRM, or as it’s so lovingly referred to nowadays, ‘model-driven’ apps. What you had were a number of entities (eg Accounts, Contacts, etc), all of which contained fields. Fields could be different types (text, integer, boolean etc), and have varying properties on them. You could set them to be required (or not), searchable (or not), and have so much fun.
At the heart of a field is the name that it has. Well, technically there are two names. One is the actual database name. Once a field was created & saved, this was effectively written in stone. The only way to handle a situation where you spelled this incorrectly was to delete it, and then recreate it. Even then, it could still be floating around in the back-end database in its original form.
The second name is the Display name (or Display label). This was the text used on the entity form itself, & could be changed as desired. This was actually really useful – many a time a business unit would say something like ‘we don’t want the field to show as Zip/Postal Code’; we want it to say ‘Postcode’. Well, that was easy enough to address – simply go ahead, load up customisations, & change the display name property for the field. Everyone was impressed & happy, and could get on with their work.
There were of course times that Business Unit A would say ‘I want ‘ABC’ as the display name’, and then Business Unit B would say ‘Ah, but I want ‘XYZ’ as the display name!’. To handle this, it was very possible to customise the label on the form itself, which would then override the display name value. This, of course, would only be valid for that specific form, so it was then imperative to have different forms for the different business units.
Now, in the good old days we use to create SQL queries against the database, SSRS reports, etc. In order to do this, we needed to know the actual underlying (database) field name. We could of course open up customisations, & start trawling through, but there are better methods for doing this. One of these is Level Up by Natraj Yegnaraman. This can be found at https://github.com/rajyraman/Levelup-for-Dynamics-CRM, and is an extension which can be run on Chrome, Edge on Chromium, & FireFox).
Using this amazing tool, it was possible to merely load an entity form up in an existing system, and then TADA! At the click of a button (well, two clicks actually), the underlying database name was revealed. This was an absolute lifesaver, so many times.
So there we’ve been, toddling along for many years like this. It worked, and worked well. All was good.
Then came along canvas apps. Now I’m not a canvas app guru by any means – I’m quite new to them, and still trying to wrap my head around the ‘special’ way in which they operate. Thankfully there are quite a few gurus in the community who have given me help in one way or another to learn how to carry out various functions, and I think that I may JUST be starting to get the hang of it.
With the current COVID-19 situation, I’ve been working on a series of apps for work, to help local authorities. One of these is a canvas app for call centres, to record information easily & quickly. We chose to go down the canvas route due to being able to have a clean layout, as well as being able to display information for the operators to read. This would have been much more difficult in a traditional model-driven app, especially as such things as dialogues have been deprecated.
This was working remarkably well – it was creating the task record, and setting all of the different values that I needed. For those who are curious as to why I was using a Patch statement, rather than submitting the form, it was due to needing to set the ‘Regarding’ field, which has some very special behaviour!
Then someone on the team said ‘Hold on – we’re only storing one address. Let’s change the field display names to remove the ‘Address 1′ part, so that we don’t confuse users’. OK – I didn’t INITIALLY see any issue with this. I bet that you can see what’s coming through…
Yes – you’re right. The patch statement isn’t referring to the field database name. It’s referring to the field display name! The reason for this is that this is the syntax that Canvas Apps use – there doesn’t seem to be a way to refer to the actual underlying field database name
Of course, I only actually discovered this when I ran through the canvas app again. And indeed, it was whilst demonstrating it to other people! Oh joys – what a wonderful time for it to happen.
So, I then had to figure out what had happened – thankfully that didn’t take too much time. What DID take time was going through every single place in the canvas app that had code referring to the specific fields, and update them to the new (correct) values. This therefore ended up looking like:
So, the vitally important lesson to learn here is be VERY careful when changing field display names, especially if you have one (or more) canvas apps that are referencing them. The last thing that you want is a major headache in having to go back through every place that refers to them, and changing/updating the values.
The only workaround that I’d suggest, is that if you’re wanting to change how fields display in the canvas app itself, change the ‘Text’ value for the field:
That way, HOPEFULLY, nothing will break moving forward.
I hope that you’ve found this useful. If you have a different way in which you’ve handled this situation, feel free to leave a comment below!
For the last few days, I’ve been working on an app. Not just any app – it’s a canvas app! (It actually happens to be a COVID-19 related app, for local authorities to use to contact vulnerable people & check they’re OK etc).
Now, my background isn’t canvas apps – it’s the model-driven app approach. I’ve been doing this for years – after all, my experience goes back to Microsoft CRM 3.0! So that’s all really nice & easy for me (even with some of the more modern ‘tweaks’ that have been brought in). Canvas apps, on the other hand, are very different from what I’m used to, and are taking quite a bit of getting used to.
See, the following example is easy in a traditional model-driven app:
Create a contact, save various attributes to the contact record. Then create a task, and set the Task Regarding field to the contact that you’ve just created
Looking at that, my mind says ‘easy-peasy’!. I create the fields required for the contact entity (& task entity as well, if needed). I then add them to the entity form/s (creating or modifying the form view/s as well). Finally, I create a Business Process Flow for users on the contact entity, and append the task creation to it. Simple, and done – not much time needed to be spent.
But when needing to do this as a canvas app, things change around QUITE a bit. I can’t create that business process flow, and I have multiple screens to have all of the information on.
Now, if I could add the ‘Regarding’ field to the edit form grid, and apply formatting to it, I could hopefully then just submit & save the grid. However, that unfortunately doesn’t work. I can add the field, but when I do so, I get the following:
So that doesn’t work. Hmmm – how then should I go around doing it?
So I was stumped. Thankfully we have an amazing community, and on reaching out to someone within it (thanks Eric!), I was helped out. I therefore thought to write this post up, so that it can help others as well.
There are two parts to this, for my specific scenario:
Saving the contact record down. This is a matter of using (in my case) the command ‘SubmitForm.ContactInformation’ on my contact form screen. I can then also set a variable if I want to, to refer to the Contact record GUID (hey – I’m trying to be cool here & show that I can!)
Finding a different way to save my task record. I accomplished this using the Patch statement – this thankfully wasn’t too difficult for me to grasp how it worked.
What I did was add the following line in my Patch statement when I was wanting to save the task: ‘Regarding:ContactForm.LastSubmit’ (‘ContactForm was the name of the form for the contact information). What this did was write into the record the GUID for the contact record that I last saved.
An alternative to this would be to use a variable instead, and set it there.
Thankfully this all worked. I’m now able to create Task records and set their Regarding field value to the Contact that I set up before them – which is the exact thing that I was trying to do!
I hope that this has been helpful – leave a note in the comments if you’ve found another way of doing this.