Updating User Settings with Power Automate

Here’s a scenario that could be all too familiar to us. We’re on-boarding users (to either Dynamics 365 or a Power Platform app), & they’re new to the environment that it’s deployed to. So they’re set up, and all ready to go. Suddenly they start asking why records created (or modified) by colleagues show up as having the wrong time on them.

Reverse Wall Clock Unusual Numbers Backwards Modern Decorative ...

Does this sound familiar? I’m sure it does to quite a few people out there!. See, there’s no way to set a default system-wide time zone in Dynamics 365 (or Power Platform). At least not that I’ve come across – if you know of one, please comment below with instructions as to how to do this!

As a result, users are given the default timezone, and need to change it. This is easily done through the Personalization settings area in the app. Users click here, and then select their appropriate time-zone. Brilliant…or so you’d think.

See, when it’s one or two users, it’s generally OK to tell them to do that. However, when it’s 200 or 2000 users, you’re going to get push-back. The last thing you want is for a large number of them to start contacting you to work out how to do it (read the instructions, perhaps?).

User queue stock photo © zam ri (OneO2) (#258450) | Stockfresh

I’ve had this scenario over the last week, where the client actually told us that they didn’t want us to tell users to update it manually. They wanted a better solution.

Well, there is a solution out there to update users. It’s the ‘User Settings Utility’ app that’s in the XrmToolBox (https://www.xrmtoolbox.com/plugins/MsCrmTools.UserSettingsUtility/). Really neat & nifty, and does just what it says on the box. Simple enough to select users (or all of them at a time), select the time-zone you’re wanting to apply to them, and click a button. Hey presto – it’s been updated

Hmm. But what if you didn’t want to have to do this manually. Or (and this is what I was dealing with), there were decent enough number of users being added to the app every few days, & I didn’t want to have to do this as a manual task.

So I started digging into how the time-zone setting was actually stored. It turns out that there’s an entity called ‘User Settings’, which is associated with a User record. Oh, and if you’re going to want to take a look at this entity to see what it contains, it’s NOT available through the front end. You can’t go into the entity list and just display it (though if you’ve found a way to do this through the Power Platform NATIVELY, drop me a line, please?).

Anyhow, back to things. There’s a value for ‘TimeZoneCode’, which maps to a specific time-zone. Aha, I thought! Right – now what’s the best way that I could work out to do this automatically. Checking in with some contacts in the tech community (thanks BlackOps etc!), Power Automate was suggested, so I started to see about how I could go about it…

So, I created a Power Automate Flow (haha…I got the name right there!). On creation of a new user record, it would programmatically go away and update the value to the one for the time-zone that I wanted it to be set as. This actually worked really well.

The only drawback is that through the user interface, it’s not actually shown as being updated, though it has been. Or sometimes it changes, but doesn’t reflect it accurately. This is somewhat annoying, and caused me quite some confusion between checking the front end to see if things were working, & confirming through the back end (& opening records up) to see that it was. I still have NO idea why this was happening.

Before changing my settings
After changing my time zone to USA (EST)

For my specific scenario, all of the users are in the UK, so I set it to update every user on creation to the UK time-zone. Obviously if you have users in different time-zones, you’d want to set this differently. This shouldn’t be an issue though, as you can expand the Power Automate Flow and add logic conditions/branches to be able to do this.

Now I think that this is pretty cool, and I couldn’t find anything out there for this. I’ve therefore decided to release this in a small solution, for others to be able to use. Part of this is the entire list of time-zones with their specific codes, so that you can update to whichever one you need to.

I hope that this helps solve a small but annoying problem (at least it did for me). Please do provide feedback if you want to!

Thoughts around the Connection entity

I decided to write this post due to currently looking at the Connections entity. This is for a current project with a very specific purpose. When this came up, my thoughts went back to a previous project some years back when we also looked to use the Connections entity. I therefore thought that it would be good to recap & share my experience.

What are Connections?

Now, the Connections entity truly is a wonderful piece of work. It’s one of the core features that doesn’t actually get much time or effort devoted to it! However, it underpins a lot of the way that Dynamics 365 has been built to work over time.

The best way to summarise Connections is:

Connections are a very easy way to connections records without needing to have to create a custom relationship in the system. Connections can be used between records from the same entity, or from different entities.

See, you are able to connect one record to another record within the system. This could be account to account, account to contact, or contact to a custom entity. There are practically no limits, apart from the extent of your mind! All of this is done by leveraging the functionality that Connections brings to the table.

Note that I’m not talking about lookup fields here, which are also great, but work differently, and require creating a relationship between entities (or even within the same entity).

Just a quick reminder here that custom entities need to be enabled for connections – it doesn’t happen as standard when creating them. You can either do this when creating it, or you can edit the settings for it later:

How to use Connections

In order to connect one record to another, you need to open the first record & click the Connect button on the toolbar:

You’ll then be presented with the New Connection screen, where you’ll select the record that you want. Click the ‘All Records’ item at the top & then ‘Change View’ to select the actual entity that you’re wanting to look for:

You then select the record that you’re wanting, and save. Hey presto, the two records are now connected! To see the connected records, look at the associated ‘Connections’ setting from either record:

OK, so this is really all brilliant. For the absolute majority of situations, it works, and works well. There’s nothing better for it. There are a few small issues, such as the fact that you can’t use Business Process Flows or Business Rules for custom logic, but instead need to use Javascript, but for the most part they work well.

Edge case scenarios & issues

However, there are some edge case scenarios that I’ve come up against, which is the whole purpose for writing this blog post.

What happens if you’re trying to use Connections to establish a hierarchy of records. Eg one record is a parent of another record. Well, you could use a lookup field instead, but if you wanted to define specific attributes for the actual relationship, that wouldn’t work.

Here’s the scenario. You’re needing to capture the relationship between different people, along with certain attributes (eg if they’re a legal guardian, or a trustee, or have power of attorney, etc). You’d think that Connections would work brilliantly for this. After all, you can modify the actual Connections entity to add custom fields onto it. So for example, you could have something like the following:

Note: I’m not referencing Connection Roles, as you can only have a single connection role per connection. In the scenarios I’m handling, I’m needing to have multiple attributes per connection.

So you create the connection between the two records, and you set the attributes that you require. All good. What’s also good to remember is that Connections are bi-directional. You can view them from either ‘side’ of the connection. Eg:

Record 1

Record 2

That’s actually really helpful & useful in the normal scheme of things. You can easily see connections from either side.

But there’s a catch, or even (in our case above), an issue. If we open up each of the two Connection records, we’ll see the following data.

Joe Bloggs connecting to Helen Sommers:

Helen Sommers connecting to Joe Bloggs:

Can you spot the issue? Of course you can! On BOTH of the connection records, the custom fields that we set have the same values. We originally connected Joe Bloggs to Helen Sommers as the Legal Guardian, Power of Attorney & Trustee. Well, if we open up the connection record from Helen Sommers, we’re seeing the same values set, just in the opposite direction!

This is actually due to how Connections work. When you create a connection Record A to Record B, the system automatically creates a mirror Connection record from Record B to Record A. When it does this, it copies all of the values that you’ve set over to this mirror record.

So when you look at the data, you can’t actually see how the structure should work. It’s an issue. Especially if you’re passing the data to other system/s that may need to evaluate it. They just can’t understand this properly, and you’ll get some VERY unwanted results out of this.

Now, there is actually a field within Connections that shows which record is the ‘master’ (ie the one you actually created), and which one is the ‘mirror’ that the system created:

However even with this in place, we’ve found issues when using it:

  • If you’re relying on people looking at the record to see the information, they’re going to make mistakes (ie not checking this value). With the fact that the values are also displayed on the mirror record, this is very prone to user error, and isn’t a good way to do things
  • If passing information to another system (ie the record & the values), you need to program it to only allow it to pass records with this flag set correctly. If the other system is writing back data, it also needs to be configured to write back to the same record.

Summary

With all of this in mind (& especially considering that users may create connections from the ‘wrong direction’, which is quite possible to happen), it’s important to think of the best way to architect systems for regulatory purposes. Financial, legal & other judicatory requirements need to have a system that can handle them properly & accordingly, and not leave room for error.

Therefore, if you’re looking to handle these sorts of scenarios, I’d recommend to look at implementing a custom entity for those specific connections.

Another benefit of this is to separate out these connections from the general connections entity. That way, you’ll also be able to handle security appropriately, which is usually applicable in these sorts of situations. It will allow you to easily allow only a subset of users access (read and/or write) to this data, rather than trying to apply it to Connections (which is going to be a major headache!)

Canvas Apps & renaming field labels

Today I want to share with you something that I’ve realised. Changing field labels can have unintended consequences!

Let’s cast our minds back to the days of ‘traditional’ Microsoft CRM, or as it’s so lovingly referred to nowadays, ‘model-driven’ apps. What you had were a number of entities (eg Accounts, Contacts, etc), all of which contained fields. Fields could be different types (text, integer, boolean etc), and have varying properties on them. You could set them to be required (or not), searchable (or not), and have so much fun.

At the heart of a field is the name that it has. Well, technically there are two names. One is the actual database name. Once a field was created & saved, this was effectively written in stone. The only way to handle a situation where you spelled this incorrectly was to delete it, and then recreate it. Even then, it could still be floating around in the back-end database in its original form.

The second name is the Display name (or Display label). This was the text used on the entity form itself, & could be changed as desired. This was actually really useful – many a time a business unit would say something like ‘we don’t want the field to show as Zip/Postal Code’; we want it to say ‘Postcode’. Well, that was easy enough to address – simply go ahead, load up customisations, & change the display name property for the field. Everyone was impressed & happy, and could get on with their work.

There were of course times that Business Unit A would say ‘I want ‘ABC’ as the display name’, and then Business Unit B would say ‘Ah, but I want ‘XYZ’ as the display name!’. To handle this, it was very possible to customise the label on the form itself, which would then override the display name value. This, of course, would only be valid for that specific form, so it was then imperative to have different forms for the different business units.

Now, in the good old days we use to create SQL queries against the database, SSRS reports, etc. In order to do this, we needed to know the actual underlying (database) field name. We could of course open up customisations, & start trawling through, but there are better methods for doing this. One of these is Level Up by Natraj Yegnaraman. This can be found at https://github.com/rajyraman/Levelup-for-Dynamics-CRM, and is an extension which can be run on Chrome, Edge on Chromium, & FireFox).

Using this amazing tool, it was possible to merely load an entity form up in an existing system, and then TADA! At the click of a button (well, two clicks actually), the underlying database name was revealed. This was an absolute lifesaver, so many times.

So there we’ve been, toddling along for many years like this. It worked, and worked well. All was good.

Then came along canvas apps. Now I’m not a canvas app guru by any means – I’m quite new to them, and still trying to wrap my head around the ‘special’ way in which they operate. Thankfully there are quite a few gurus in the community who have given me help in one way or another to learn how to carry out various functions, and I think that I may JUST be starting to get the hang of it.

With the current COVID-19 situation, I’ve been working on a series of apps for work, to help local authorities. One of these is a canvas app for call centres, to record information easily & quickly. We chose to go down the canvas route due to being able to have a clean layout, as well as being able to display information for the operators to read. This would have been much more difficult in a traditional model-driven app, especially as such things as dialogues have been deprecated.

One of the functions that I’ve had to learn to do this has been to use the ‘Patch’ function (see https://docs.microsoft.com/en-us/powerapps/maker/canvas-apps/functions/function-patch for more information on this. The following is an example of one of the Patch statements that I was using:

This was working remarkably well – it was creating the task record, and setting all of the different values that I needed. For those who are curious as to why I was using a Patch statement, rather than submitting the form, it was due to needing to set the ‘Regarding’ field, which has some very special behaviour!

Then someone on the team said ‘Hold on – we’re only storing one address. Let’s change the field display names to remove the ‘Address 1′ part, so that we don’t confuse users’. OK – I didn’t INITIALLY see any issue with this. I bet that you can see what’s coming through…

Yes – you’re right. The patch statement isn’t referring to the field database name. It’s referring to the field display name! The reason for this is that this is the syntax that Canvas Apps use – there doesn’t seem to be a way to refer to the actual underlying field database name

Of course, I only actually discovered this when I ran through the canvas app again. And indeed, it was whilst demonstrating it to other people! Oh joys – what a wonderful time for it to happen.

So, I then had to figure out what had happened – thankfully that didn’t take too much time. What DID take time was going through every single place in the canvas app that had code referring to the specific fields, and update them to the new (correct) values. This therefore ended up looking like:

So, the vitally important lesson to learn here is be VERY careful when changing field display names, especially if you have one (or more) canvas apps that are referencing them. The last thing that you want is a major headache in having to go back through every place that refers to them, and changing/updating the values.

The only workaround that I’d suggest, is that if you’re wanting to change how fields display in the canvas app itself, change the ‘Text’ value for the field:

That way, HOPEFULLY, nothing will break moving forward.

I hope that you’ve found this useful. If you have a different way in which you’ve handled this situation, feel free to leave a comment below!

Canvas App record set Regarding field

For the last few days, I’ve been working on an app. Not just any app – it’s a canvas app! (It actually happens to be a COVID-19 related app, for local authorities to use to contact vulnerable people & check they’re OK etc).

Now, my background isn’t canvas apps – it’s the model-driven app approach. I’ve been doing this for years – after all, my experience goes back to Microsoft CRM 3.0! So that’s all really nice & easy for me (even with some of the more modern ‘tweaks’ that have been brought in). Canvas apps, on the other hand, are very different from what I’m used to, and are taking quite a bit of getting used to.

See, the following example is easy in a traditional model-driven app:

Create a contact, save various attributes to the contact record. Then create a task, and set the Task Regarding field to the contact that you’ve just created

Looking at that, my mind says ‘easy-peasy’!. I create the fields required for the contact entity (& task entity as well, if needed). I then add them to the entity form/s (creating or modifying the form view/s as well). Finally, I create a Business Process Flow for users on the contact entity, and append the task creation to it. Simple, and done – not much time needed to be spent.

But when needing to do this as a canvas app, things change around QUITE a bit. I can’t create that business process flow, and I have multiple screens to have all of the information on.

Now, if I could add the ‘Regarding’ field to the edit form grid, and apply formatting to it, I could hopefully then just submit & save the grid. However, that unfortunately doesn’t work. I can add the field, but when I do so, I get the following:

So that doesn’t work. Hmmm – how then should I go around doing it?

I did (obviously!!) take a look online. Here I came across this wonderful article all about polymorphic lookups (https://docs.microsoft.com/en-us/powerapps/maker/canvas-apps/working-with-references). Having read, & re-read through it, I’m STILL not understanding what exactly I should be doing by this!

So I was stumped. Thankfully we have an amazing community, and on reaching out to someone within it (thanks Eric!), I was helped out. I therefore thought to write this post up, so that it can help others as well.

There are two parts to this, for my specific scenario:

  • Saving the contact record down. This is a matter of using (in my case) the command ‘SubmitForm.ContactInformation’ on my contact form screen. I can then also set a variable if I want to, to refer to the Contact record GUID (hey – I’m trying to be cool here & show that I can!)
  • Finding a different way to save my task record. I accomplished this using the Patch statement – this thankfully wasn’t too difficult for me to grasp how it worked.

So, how did I go about using the Patch statement? Well, the function is referenced here – https://docs.microsoft.com/en-us/powerapps/maker/canvas-apps/functions/function-patch. With Eric’s help, I soon started to see how to do it.

What I did was add the following line in my Patch statement when I was wanting to save the task: ‘Regarding:ContactForm.LastSubmit’ (‘ContactForm was the name of the form for the contact information). What this did was write into the record the GUID for the contact record that I last saved.

An alternative to this would be to use a variable instead, and set it there.

Thankfully this all worked. I’m now able to create Task records and set their Regarding field value to the Contact that I set up before them – which is the exact thing that I was trying to do!

I hope that this has been helpful – leave a note in the comments if you’ve found another way of doing this.

Wave 1 2020 – Search Behaviour Changes

Having applied the Wave 1 2020 release to several of my test environments, I was browsing around to see the new functionality within it, which is pretty good. However, there was something that I wasn’t expecting, which was a little startling to see! This is around the way that the search behaviour is now working within the system.

What am I talking about? Well, for years, users have asked me if they could search within a specific view. Ie if we had a view set up for ‘My accounts’, where the user is set as the account manager, it would show only the accounts where that condition applies. However when using the search functionality, the system would search & return ALL results that match the search criteria (eg if searching for ‘Apple’, it would return all accounts with the word ‘apple’ in them, regardless if the user was set up as the account manager or not).

Explaining this to users was probably the most complicated thing, in my experience (well, that, and having to then trawl through hundreds, if not thousands of records, where it’s a common word). But for the most part, they accepted it. OK – we all moved on.

Let’s see an example of this. The screenshot below shows an account that exists within one of my Sandbox environments (which has the Wave 1 2020 update applied to it):

I’m now going to search for it within the entity itself (more about Global Search at the end of this post):

Hold on – it’s not showing up! What is happening here – is the system OK???

Let me explain what’s happening. Previously (before the Wave 1 2020 update was applied) it would indeed show up in the search results.

But this has now changed! The system is now performing searches ONLY within the view that the user is using. The reason why it’s not showing up here? Well, it’s because I’m not set as the owner of the account – a different user is (and I’m using the ‘My Accounts’ view, as seen in the previous screenshot):

If I now change my view to ‘All Accounts’ and repeat the search again, the record now shows up:

I hadn’t come across this in my perusal of the release notes. On going back to it and digging deep, I found the mention here – https://docs.microsoft.com/en-us/power-platform-release-plan/2020wave1/microsoft-powerapps/improvements-quick-find-search-experience-grid.

Amusingly there’s actually even a little hint within the system for this. If you look at the entity search box, this is now the text that’s being displayed within it:

There’s also an additional feature as part of this – if you’ve prefiltered a view using column value, searching within the entity will RESPECT the pre-filtering!. OK – now this is indeed incredible:

My thoughts on this is that it’s going to be a double-edged sword. For years, we’ve been educating customers about how searching works, and now this has the potential to change things up.

Thankfully it’s actually possible to turn this off, and revert back to the way that searching has always worked – this is likely to be needed to be done quite a bit. To do this, go to Settings, Administration, System Settings, and change the value for Categorised Search to ‘Yes’ (it’s about 1/3 of the way down the page):

It would have been nice if Microsoft had made people more aware of this, in my opinion.

Please note that this only applies to searching within an entity itself. Global Search (for the moment) still uses the Quick Find view, and returns all results (regardless of filters).

MB-600 Solution Architect Exam

I haven’t really touched very much on any exams that I’ve taken so far during the lifetime of this blog. I’ve mentioned them a few times (ie how important they can be), but haven’t really gone into detail.

However, having seen various comments online recently around the MB-600 exam, I thought I’d do a post on it with my thoughts and comments!

So, what is the MB-600 exam? Well, it’s sort of the ‘Holy Grail’ for Dynamics 365/Power Platform. This is due to the actual full name for it – ‘Exam MB-600: Microsoft Power Apps + Dynamics 365 Solution Architect’. Indeed – assuming you pass it (and you’ve already passed the MB200, and either the MB210. MB220, MB230, MB240), you can officially refer to yourself as being a Microsoft certified ‘Solution Architect Expert’.

Impressive!

The exam was being talked about at the beginning of 2020, and went live (in beta) on Jan 27th 2020. If you’re wanting to book it, do so at https://docs.microsoft.com/en-us/learn/certifications/exams/mb-600.

I sat it several days after it went live, and to be honest found it quite challenging. Why was that? Well, when I sat it, there were no learning paths on Microsoft Learn for it at all. Thankfully that’s now changed – there’s a massive amount of great material at https://docs.microsoft.com/en-us/learn/certifications/power-apps-and-d365-solution-architect-expert. If you’re looking to go ahead and do the exam, I’d highly recommend you go through everything that’s there.

I’ve taken quite a few exams since early 2019, and have now taken the general approach to take exams in Beta. Although there can be some waiting until the results are announced, they’re cheaper, and give you an understanding of what’s going on.

I sat the exam through the Proctored option. I’m not going to say too much about that (you can look up online what this is about), other than to say that I feel that Microsoft really should be doing something about the proctored experience. Pearson Vue is in charge of this, but it can be really bad at times (having taken a dozen or so exams this way in the last year, I feel I’m quite qualified to be able to judge this!). I hope that things do get better for this.

So, to the exam itself. Well, I was lucky – there were no Labs in it (yet!). Several case studies, and lots of questions. Quite hard questions as well – make no mistake, they’re out to seriously test your knowledge.

The first thing that I ‘loved’ when starting the exam was the general briefing, which included something along the lines of this absolute gem (this isn’t word for word, as I’m not allowed to write it down during the exam, but it gives the gist of it):

Some question sets may have more than one solution, while others might not have a correct solution at all

Right. So tell me – if there’s no correct solution, what am I supposed to do? I’m still waiting for someone to enlighten me on this matter, as I haven’t found anyone who’s able to explain it….

Now, part of the exam rules state that it’s not allowed to share any of the exam questions. What I’ve therefore included below is an overview of the sorts of things that were covered for my exam (Note: exams are composed from question banks, so there could be many things that weren’t included in my exam, but could be included for someone else!).

  • Data imports – what they are, how to go about them, troubleshooting them, etc. Also covering different types of sources
  • Security models, permissions, security types (field level, role, user, team etc)
  • Teams integration. How it’s set up, configured & used
  • Solution patch types. What they are, how they’re applied, how they’re used, benefits & drawbacks
  • BCP (Business Continuity Planning and Disaster Recovery) processes. What option/s should you be considering to ensure your business is fully covered in a disaster situation, how are they configured
  • Portals. What they are, how they’re set up, security permissions
  • Business rules, Business Process Flows, Workflows. What each one does/doesn’t do, benefits & drawbacks, how they’re set up & configured
  • Systems – On Premise vs Cloud. The advantages and/or drawbacks of each type, and the different BCP methods (see above) for each one
  • Data integration. OData vs Custom Service for continuous data
  • SLA’s and KPI’s. What they are, when each is used, how to set up & configure them
  • System upgrade paths and compatibility. How you go about upgrading legacy systems, and the necessary path/s that you have to take for a given version number
  • Customer Service through multiple channels. Which option/s would you select for a given scenario, how would you set it up/configure it
  • CDM/CDM/PowerBI/Azure Service Bus/PowerApps. What is each one, what are the benefits/drawbacks of them, how is each one used, & set up/configuration
  • Licensing Types. What license/s would you need for a given scenario
  • D365 Sales Insights. What it is, what benefit/s it brings, how is it used
  • Data security. How is security used for Dynamics 365 & PowerBI data, how is it set up/configured
  • Field properties. For a given scenario, how would you change field properties and/or parameters?
  • Data Migration. Different options available for this, benefits/drawbacks, resolving issues
  • Form security. What is it, what are the different types of security that’s able to be used, how is it set up
  • Solution management. What are the different types of solutions, how is each one used, what are the associated risks, which option would you use for a given scenario

Wow. That’s a LOT of stuff. Like…an incredible amount. Some of it touches on parts of the system that I’ve never used before (like PowerBI). Other parts are extremely familiar.

I can’t tell you if I’ve passed it or not…YET!. Results aren’t yet out, as it’s still in beta (and from what I’m hearing, it’s likely to be remaining in beta for several months still.

So, if you’re aiming to take it – I wish you the very best of luck, and let me know your experience!

Dynamics 365 Kanban Boards

One of the great features being released as part of Wave 1 2020 for Dynamics 365 is the ability to have Kanban boards in the system!

For those people who are unfamiliar with this functionality, “Kanban” is the Japanese word for “visual signal”. A kanban board helps make work visible using cards & columns to easily display data visually. This allows people to keep on top of things, rather than be distracted by lots of lists and data in different places.

Example of a generic kanban board:

When an item on a kanban board changes status (or whatever property the board groups by), it moves to the relevant column. This could be as simple as having PostIt notes on a wall somewhere and a member of the team physically moves it to a new column, or having a record value be updated and then it automatically moves in the view. Items can also be dragged/dropped to a new column in some systems, which then updates the status

I’ve used Pivotal Tracker for several projects that I’ve been working on over the years, which works exactly in this way.

One of the drawbacks with how data is displayed in Dynamics 365 is that the views are lists of records. You can add columns for fields that you want to reference (eg status), sort & filter on them, but visually it’s not very exciting. There’s the ability of course to have charts, graphs & Power BI objects (with the ability to drill down into these), but it’s still not the best of experiences in my opinion.

Well, that’s now no longer the case! You can now use the kanban board ability to display data more visually, as well as interacting with it (think drag/drop)

Caveat: At the moment, although you can add kanban to practically any entity, it’s actually only able to be used on Opportunity

So, the steps to enable it in your environment:

  • Go to https://admin.powerplatform.microsoft.com/environments & select the environment you’re wanting to try it in
  • On the right side of the page, you’ll see the Wave 1 release (see screenshot below). Select the ‘Manage’ button, and confirm the upgrade (it’s not reversible FYI). Wait patiently for it to install (it can take several hours)
  • Once the installation is finished, refresh the environment, open the environment, click the cogwheel on the top right, and select ‘Advanced Settings’
  • Joyfully, this takes you to the old system settings menu, as this functionality hasn’t yet been moved into the configuration available at make.powerapps.com (yet!). Click the dropdown arrow next to Settings in the menu ribbon, and select Customisations
  • Open the solution up (remember, you should probably be doing this in a custom solution, rather than the default one!), expand entities, and find Opportunity. Click on it, and then click on the ‘Controls’ tab
  • You’ll see the option for ‘Add Control’. Click this, then scroll down the list until you see Kanban! Add it, and it’ll show up in the list of controls
  • Now, it’s VITAL that you save, and then publish the customisations.
  • Close all of this, and go to the Opportunity entity. Click the 3 dots to expand the menu on the menu bar, click to slide into the Show As menu, and then select Kanban (you can of course change the default view to use Kanban, if you so desire)
  • And BOOM! The screen layout will magically change, and you should now see the following sort of thing (assuming you have data for Opportunities, of course)
Image from Carl Cookson at linked365.home.blog/

Incidentally, there are actually two Kanban board views available for Opportunities. One of these groups by the record status, and the other groups by where records are within the Business Process Flow timeline (which is shown in the screenshot above). You can switch between these easily by selecting the option that you want on the screen.

Now, as I stated above, this is currently only available for Opportunity (and you need a Sales Enterprise or Sales Professional license to use it). However, I really think this is great functionality, and would hope that it’ll roll out to other parts of Dynamics 365, as well as being available for Power Apps built on the CDS.

How do I see this being valuable? Good question to ask! I think that initially it could be really valuable for customer service scenarios, especially tracking negative interactions with customers (ie where the customer isn’t happy with support and/or the resolution, or there’s a fault, etc).

The ability to display this data visually, with time filters as well, should bring things into focus quite quickly to see where a company can both improve its offering, as well as pick up any issues that are occurring. Obviously regular reporting and BI will still continue to play their crucial roles, but this is another piece of functionality being added to the overall ‘toolkit’ to help get things every better!

Channel Integration Framework (I)

So for starters, the title is somewhat of a mouthful, right? Try saying ‘Channel Integration Framework’ several times fast, and you’ll end up with some VERY interesting sounding words. Thankfully, people and organisations working with it usually shorten it to ‘CIF’. So that’s what I’m going to do as well (which will also hopefully prevent any RSI whilst I’m typing this all out).

The definition of CIF according to Microsoft is:

The Dynamics 365 Channel Integration Framework is a cloud-to-cloud extensible framework to integrate third-party channel providers with Dynamics 365 model-driven app using a browser-based JavaScript API library.

Now, for the technically minded (isn’t that all of us?), CIF is a set of API’s (methods, events & protocols) that enable developers to build their own solutions, and integrate them with Dynamics 365.
Examples of these would be a communication widget that’s running on a 3rd party provider cloud system, but that can surface and interact with Dynamics 365.

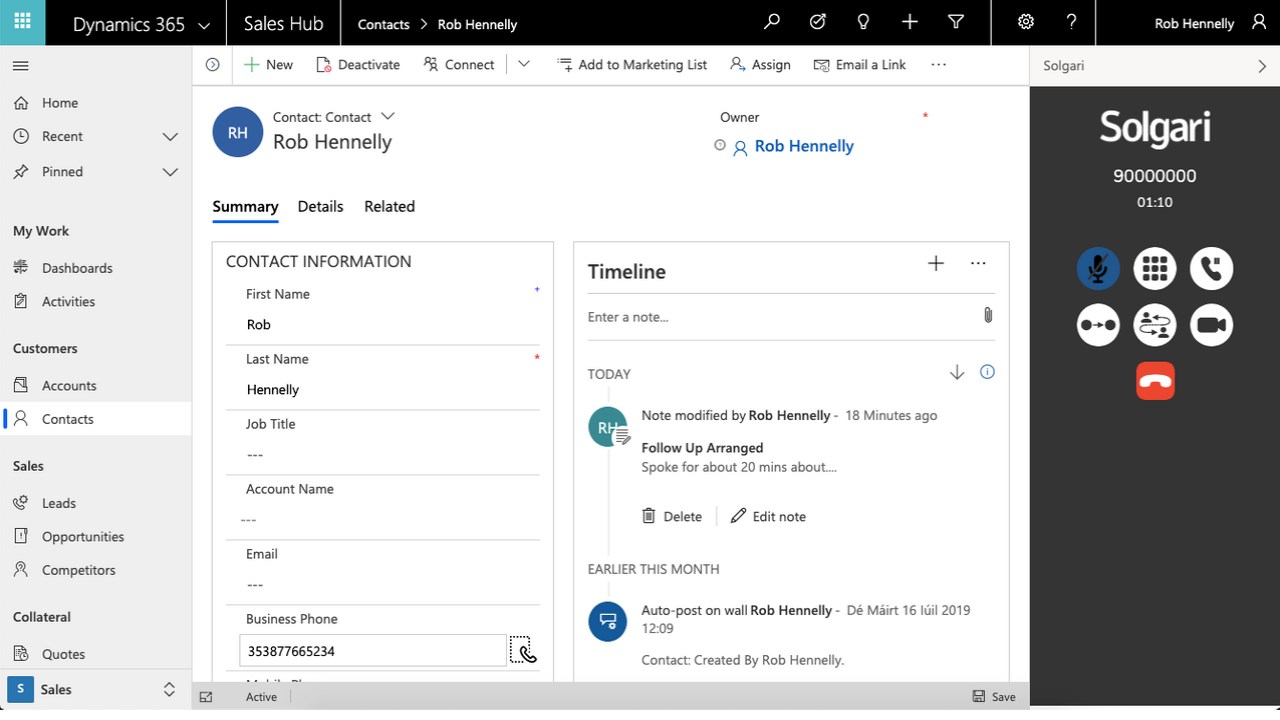
There are multiple partners out there who are doing this, such as Solgari. The immediate benefits of this is that additional functionality can be provided for customers that Microsoft hasn’t built into the system (yet!). An example of one of the functionalities provided by Solgari is the ability to dial a number directly from the Contact record (telephony):

Before CIF was available, it was usually an immense headache to integrate a 3rd party application solution into the system. It could be done of course, but was something that you had to be REALLY dedicated to doing, with all of the time, efforts and costs that it would involve.

With it being launched, many people breathed a massive sigh of relief, and then started to look around for partners who had solutions that supported it. There are now several Microsoft partners who offer solutions that integrate with CIF, and through this extend the functionality.

The CIF framework offered the following benefits:

  • It provides an extensible framework to integrate third-party cloud-based channel providers or channel aggregators with Dynamics 365 model-driven app (not Canvas)
  • It’s channel agnostic. Ie channels such as voice, video, chat, co-browse etc can be built as long as there’s a Javascript-based widget available
  • It’s not just a single direction flow of data; it allows two way communication. This therefore allows both inbound and outbound data
  • It exposes Javascript API’s (note the item above about it being a Javascript based widget)
  • Deployment is easy (well, as easy as any deployment can be!). Deployment is also the same across all apps/widgets – it follows a standard process
  • Plug & Play! It’s now very easy to have multiple different providers integrated, rather than being limited to a single provider
  • Dynamics 365 model driven app agnostic – once the channel has been built and deployed, you can then enable it on the model-driven app that you’re wanting to use it with, based on business requirements
  • Not reliant on operating system or web browser – it’s not reliant on a specific hardware/OS/browser configuration (obviously the browser needs to have the appropriate Javascript security settings enabled, or else it won’t work)
  • Screen pop! Popouts are available to display customer information that can help agents with their customer conversations and service.

The architecture behind CIF is as follows:

High-level architecture diagram of Dynamics 365 Channel Integration Framework
  1. The Dynamics 365 environment is where the CIF app is present to create and manage the required configurations
  2. The single-session Dynamics 365 model-driven app exposes the CIF panel to host the 3rd party widget
  3. The CIF Adapter enables the communication between a single-session model-driven app and the channel provider solution
  4. The web-based communication channel (2rd party) is hosted in the widget that the CIF provides. This is multi-purpose; it’s possible to host chat, email, or telephony channels of your choice
  5. The Channel Provider is the service that you want to integrate and interact with using the CIF. Channel capabilities are specific to the channel provider (ie a 3rd party solution that only supports chat won’t be able to support telephony etc!)

So essentially by using 3rd party solutions that integrate with CIF, it’s possible to have customer service offerings covering things like:

  • Telephony
  • SMS
  • Chat
  • Social media

This is really great, and is really the starting point for taking customer service to the next level. Companies want to be able to easily and quickly support their customers across all possible channels, as forcing them into using a specific channel doesn’t always work well, and can in fact be counter-productive.

Now, all of the above is of course amazing, and really great. The MAIN drawback is that this was CIF 1.0…..and it’s not possible to load a CIF 1.0 widget into Omnichannel! Aarghhh!!! It’s only possible to use 1.0 widgets with model-driven apps, which Omnichannel is not (more on that another time). So it’s possible to have chat or telephony integrating with Accounts, Contacts etc.

However, don’t despair yet. Microsoft has released CIF 2.0, which DOES integrate with Omnichannel. So stick around, and I’ll be putting up a post around how that works (I know – such a teaser!).

Bus Apps At Speed Day

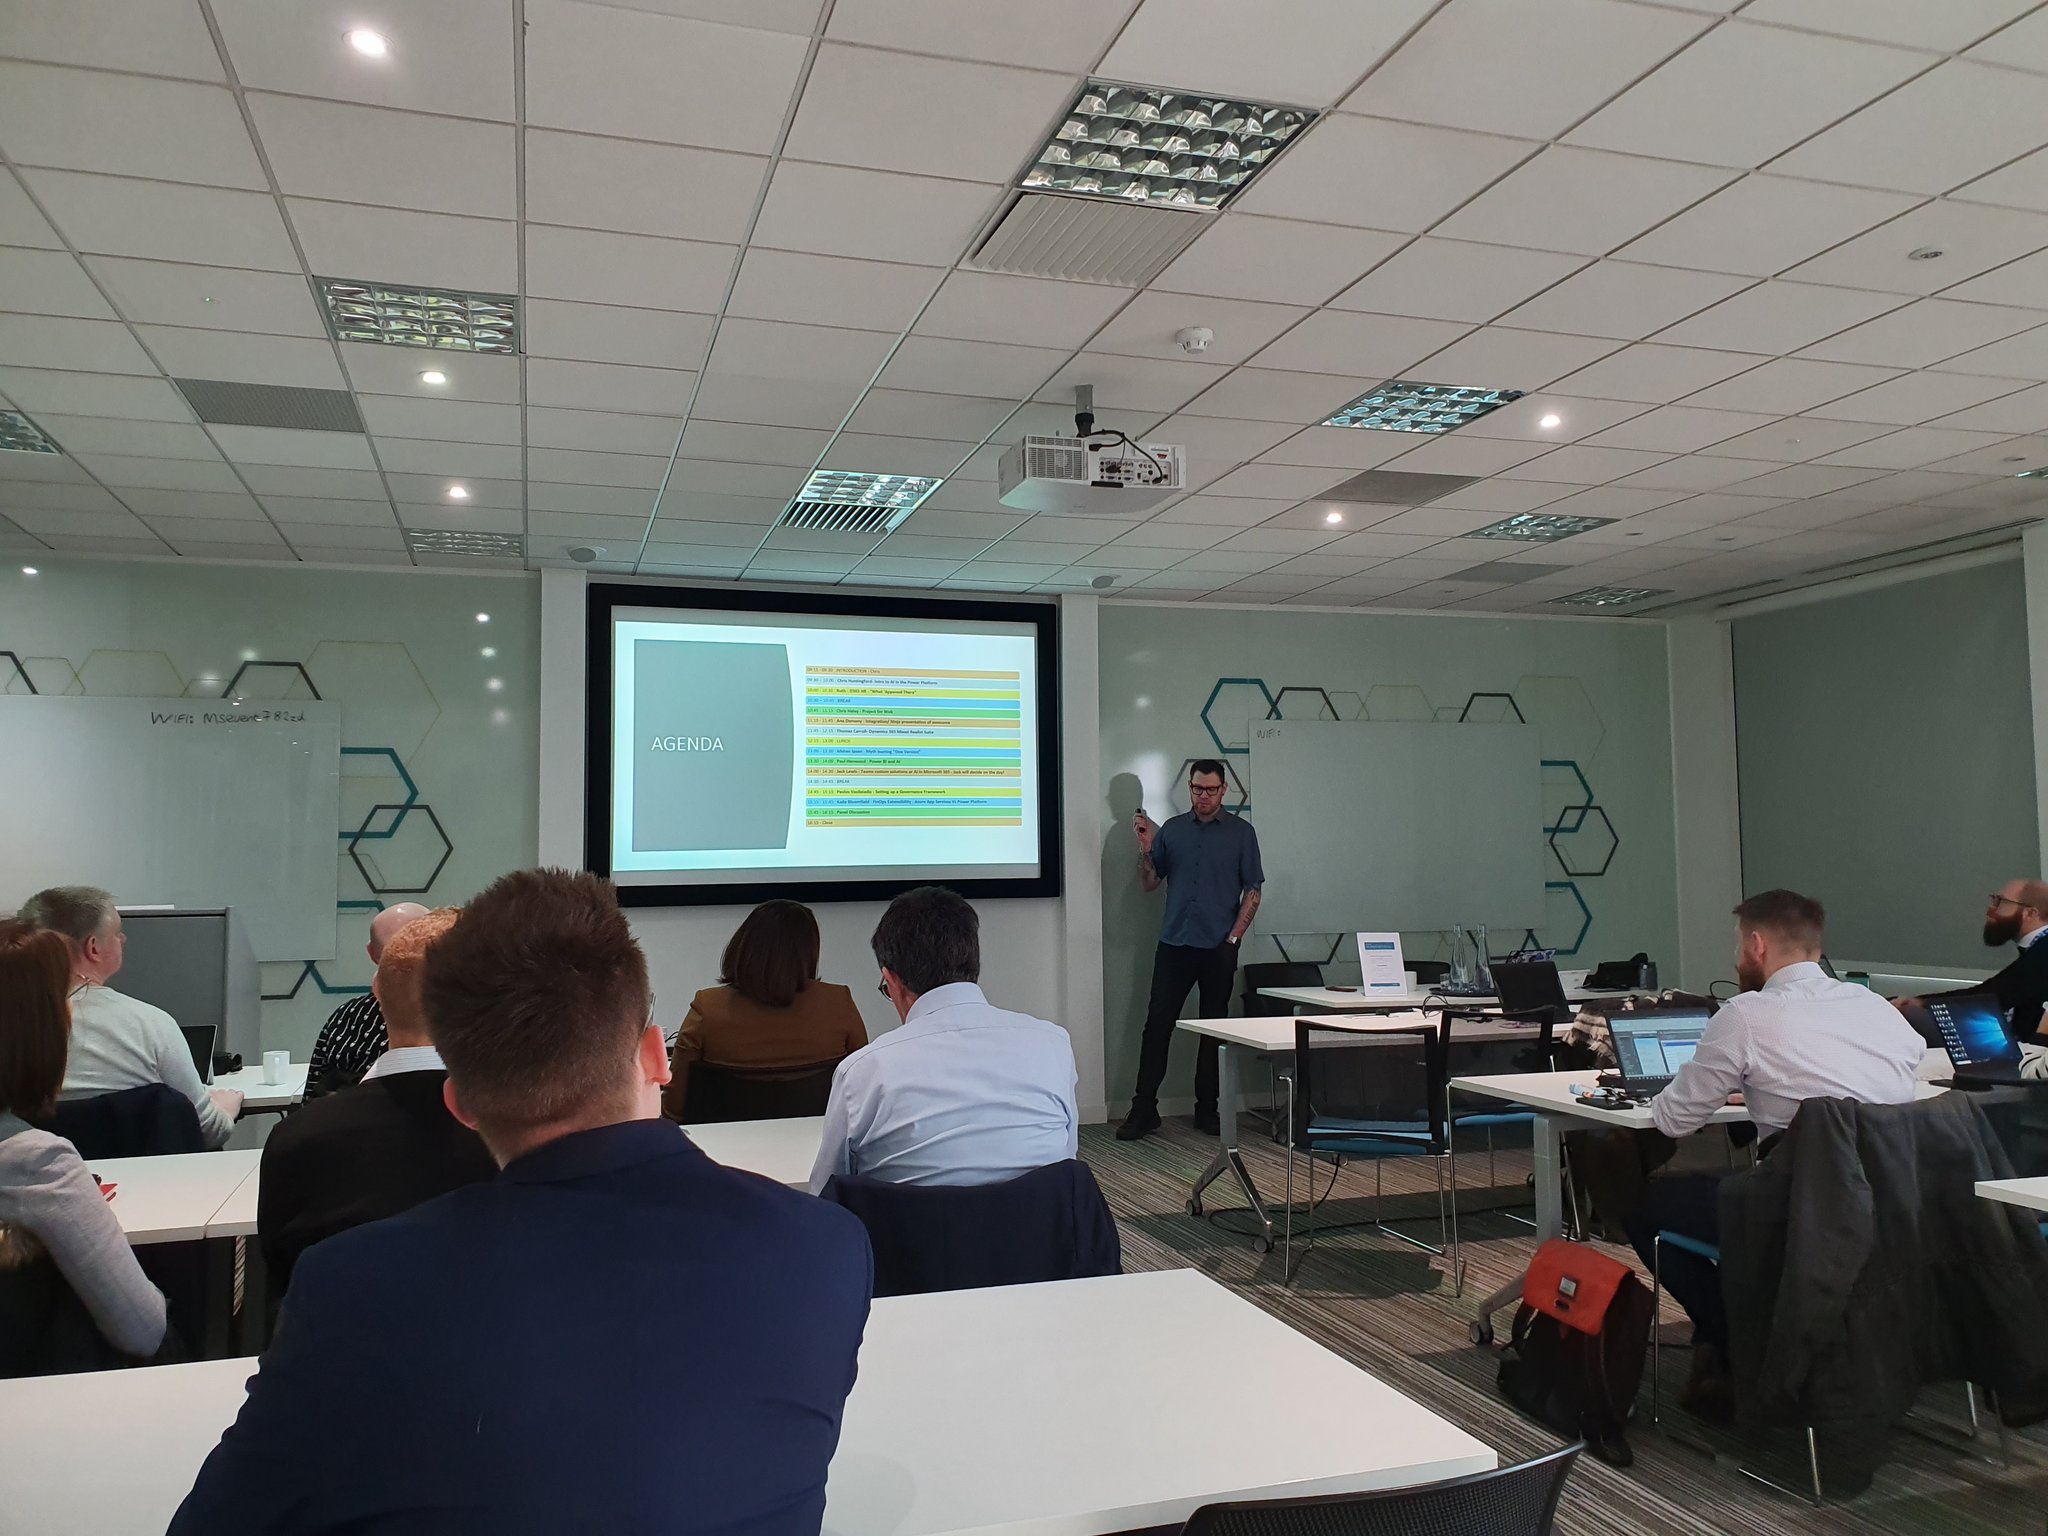
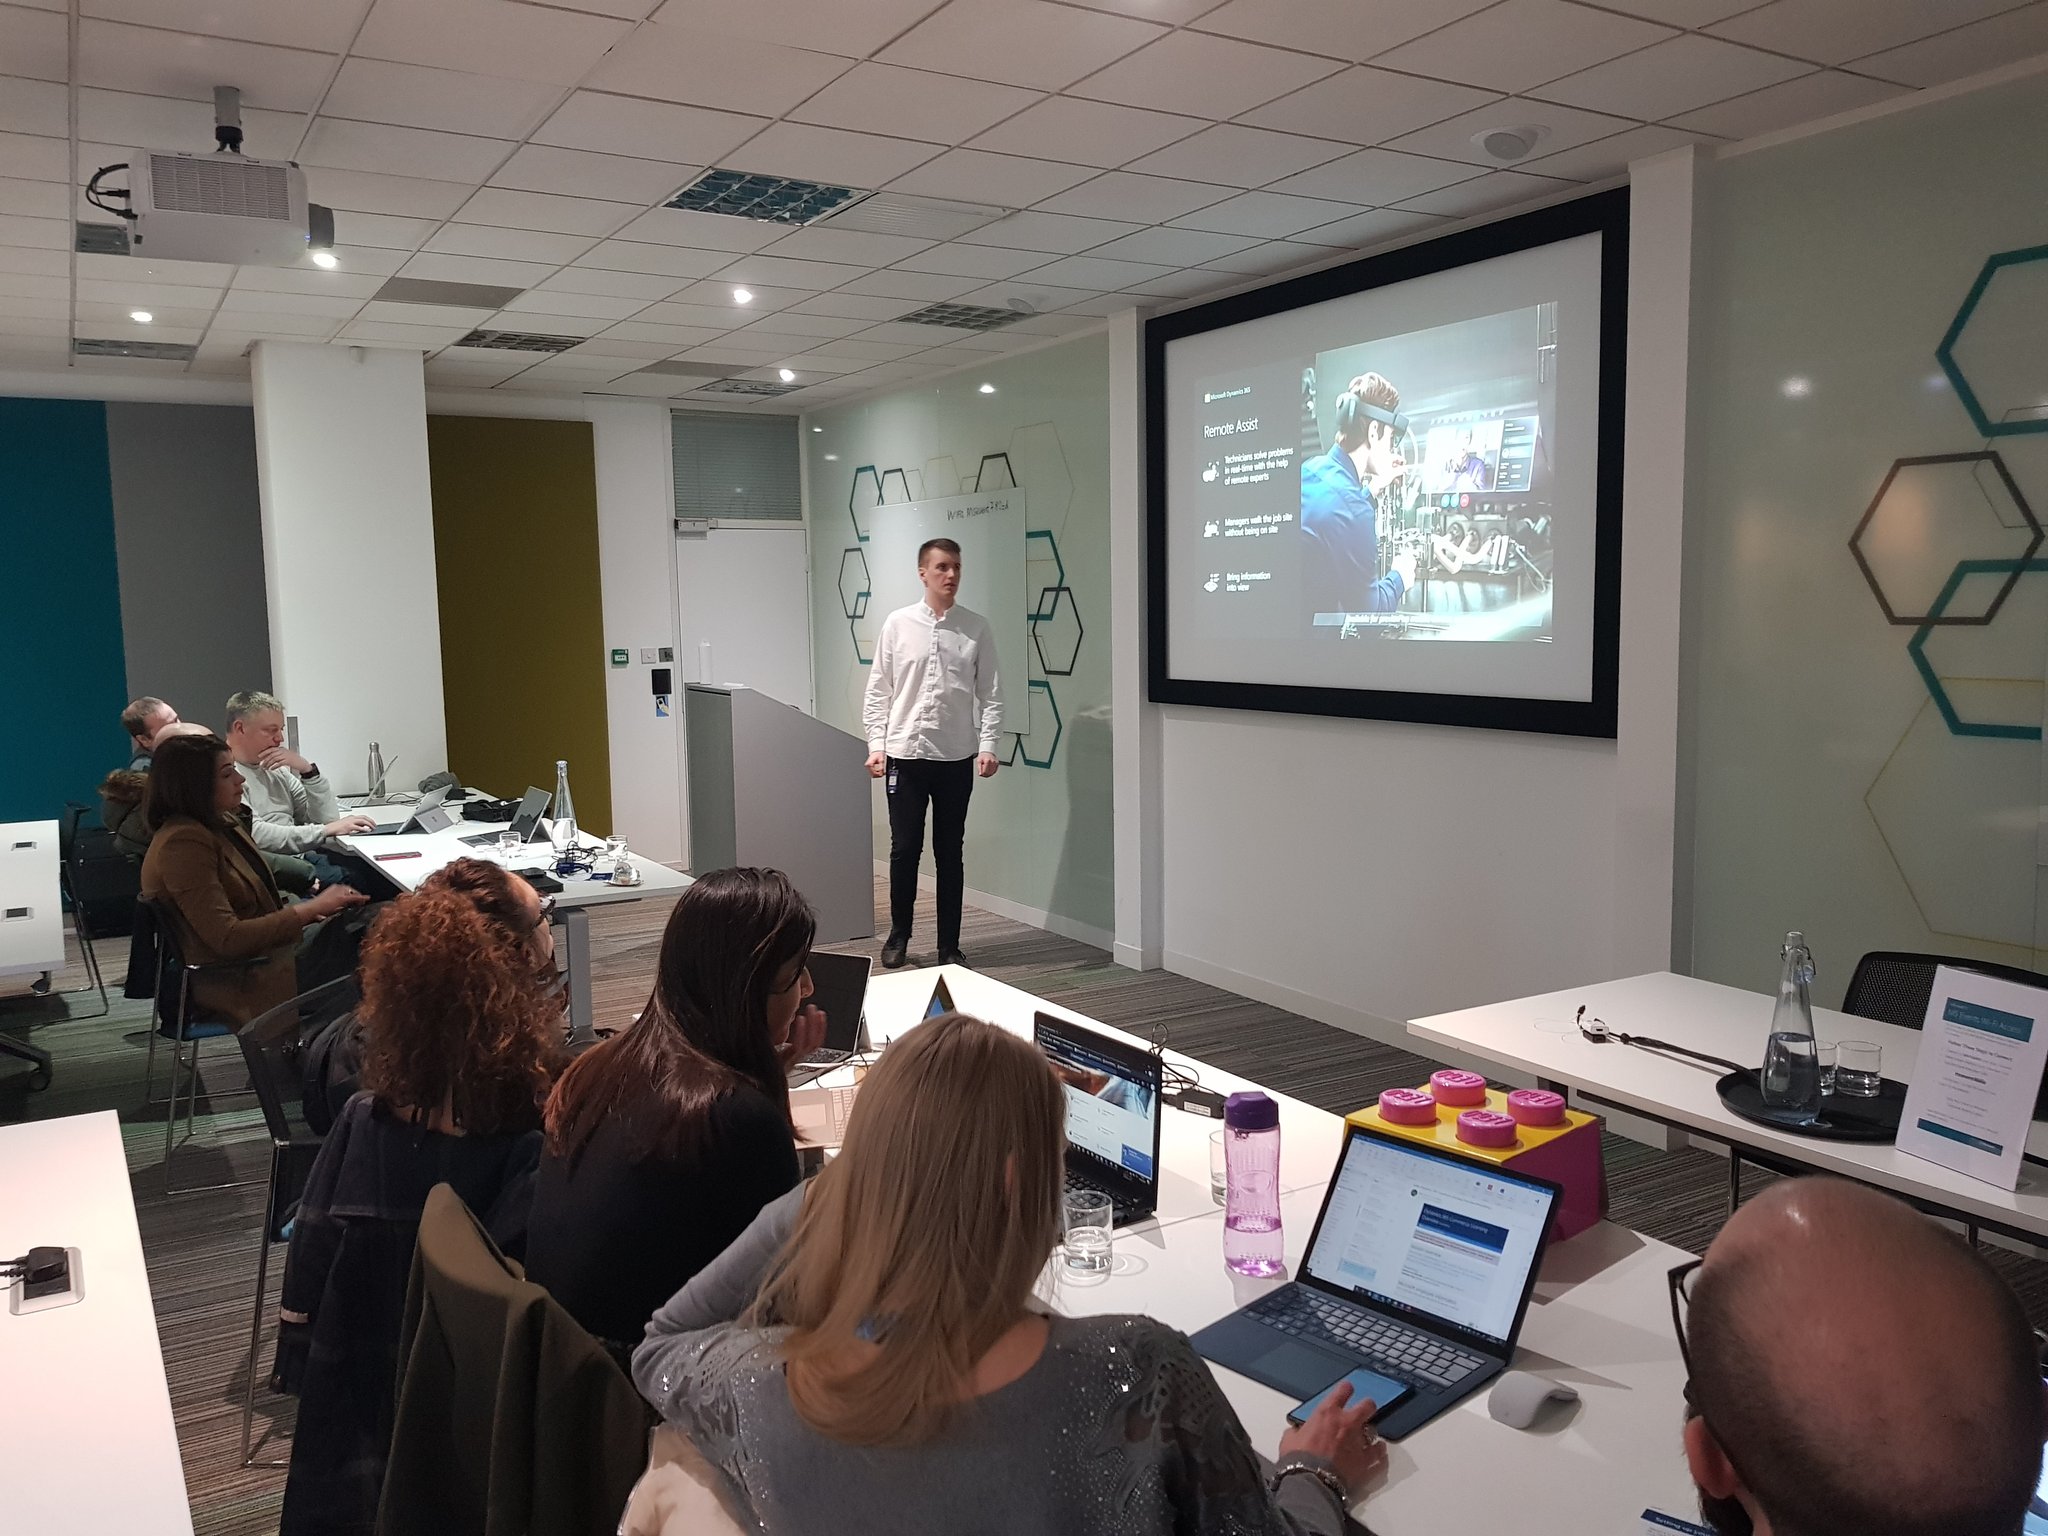
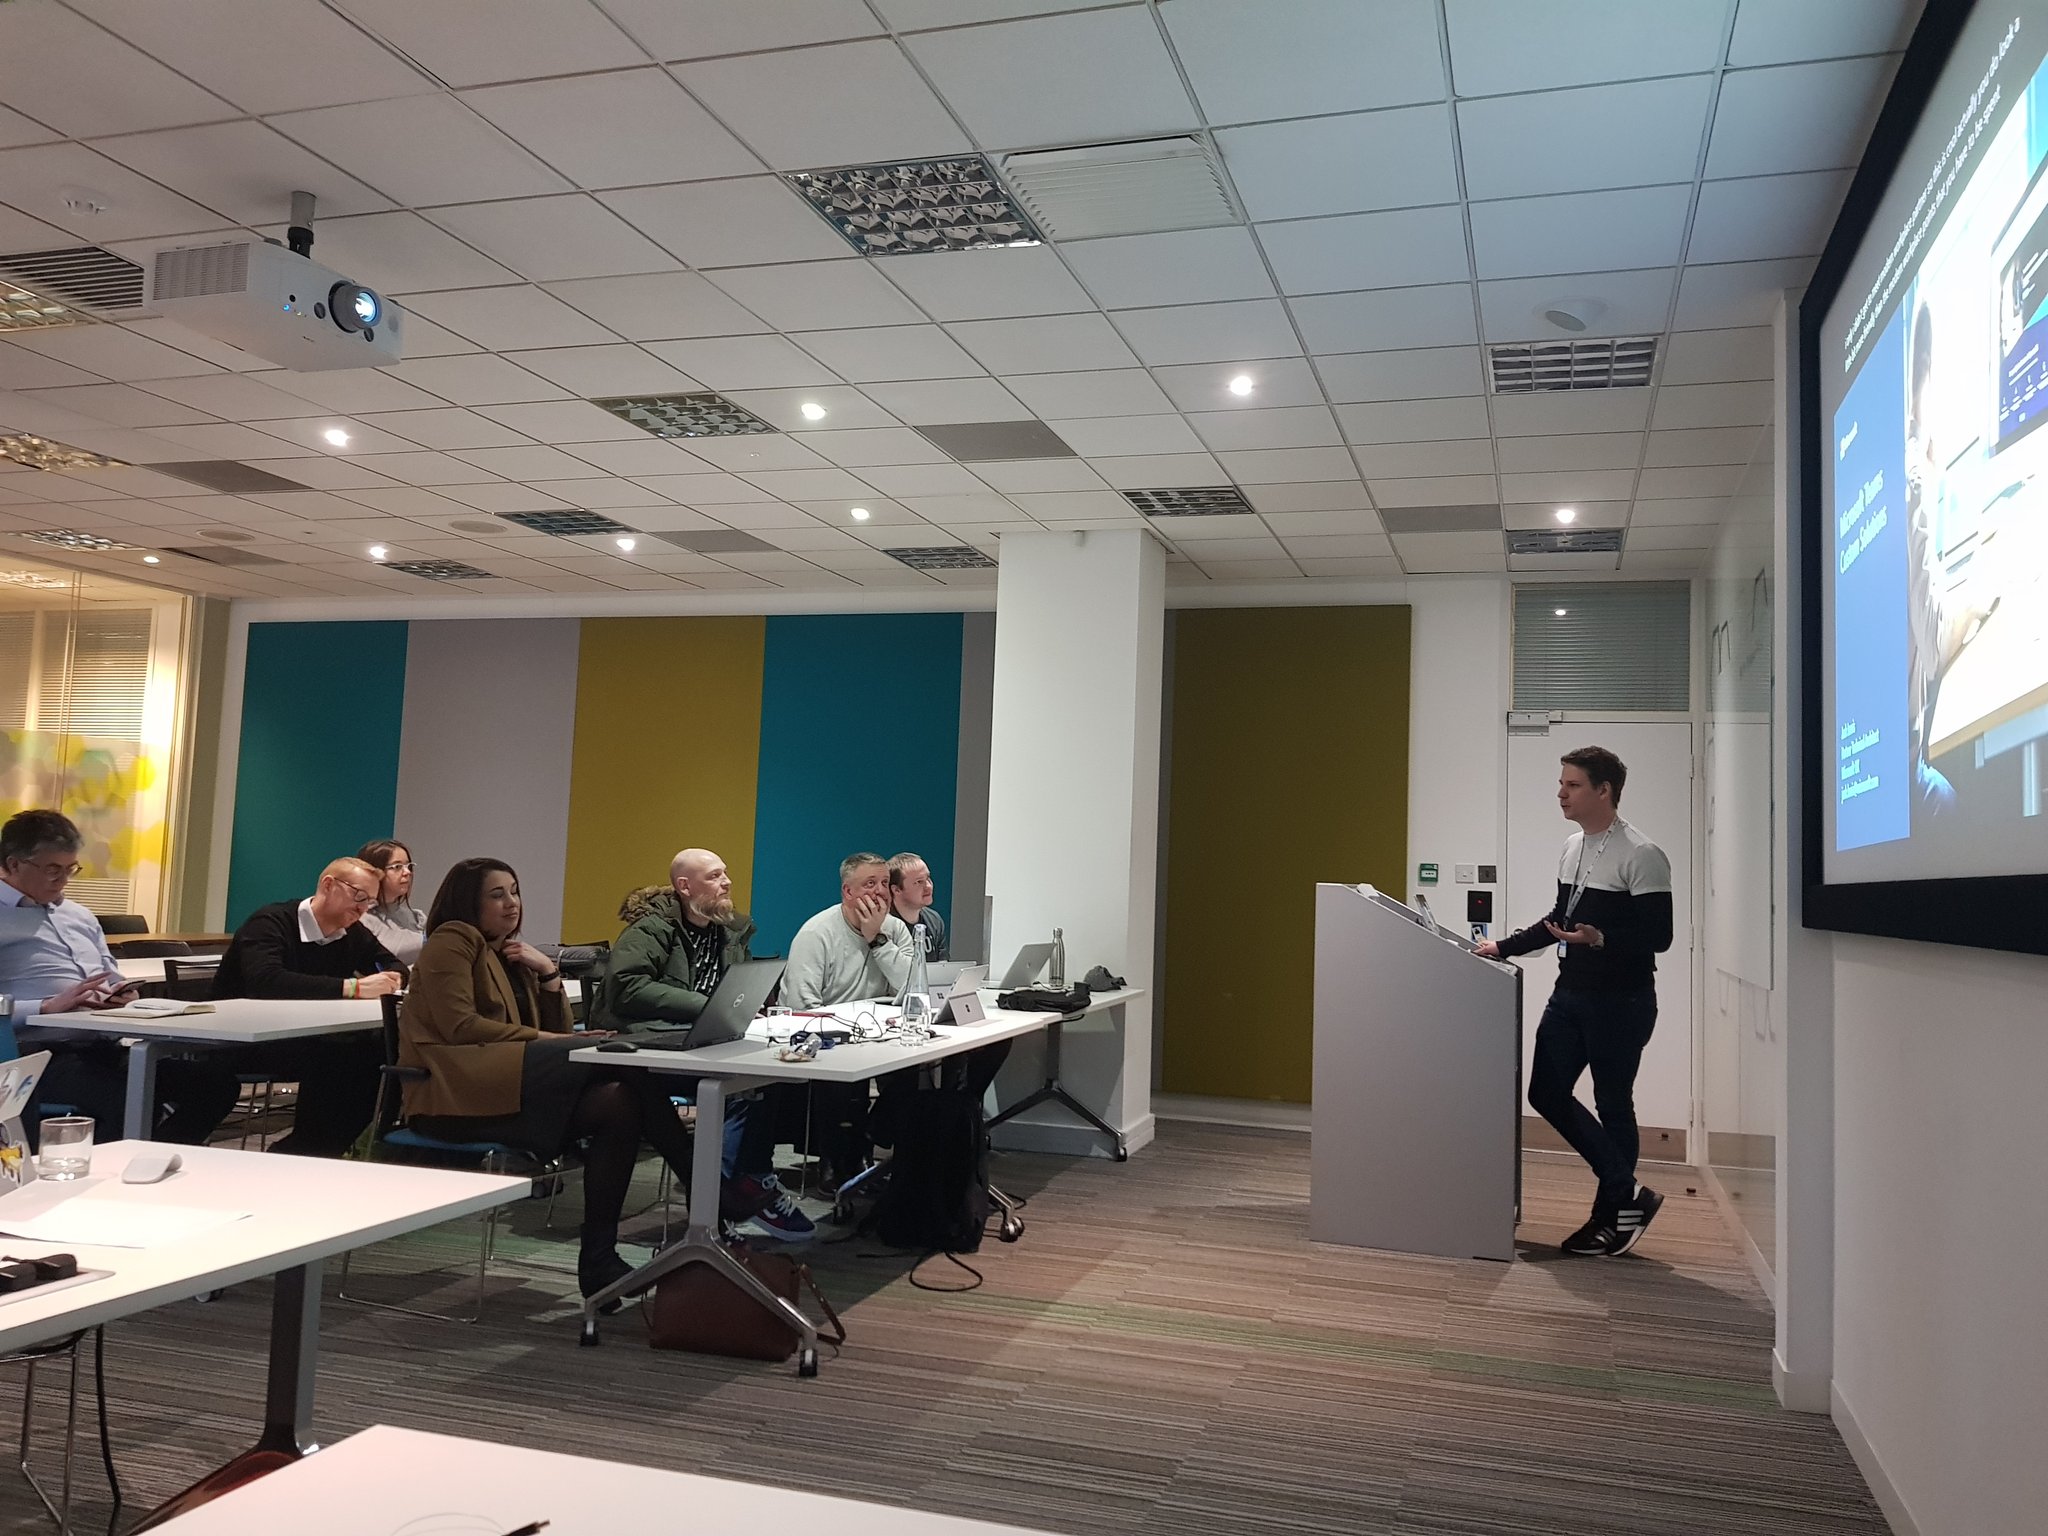
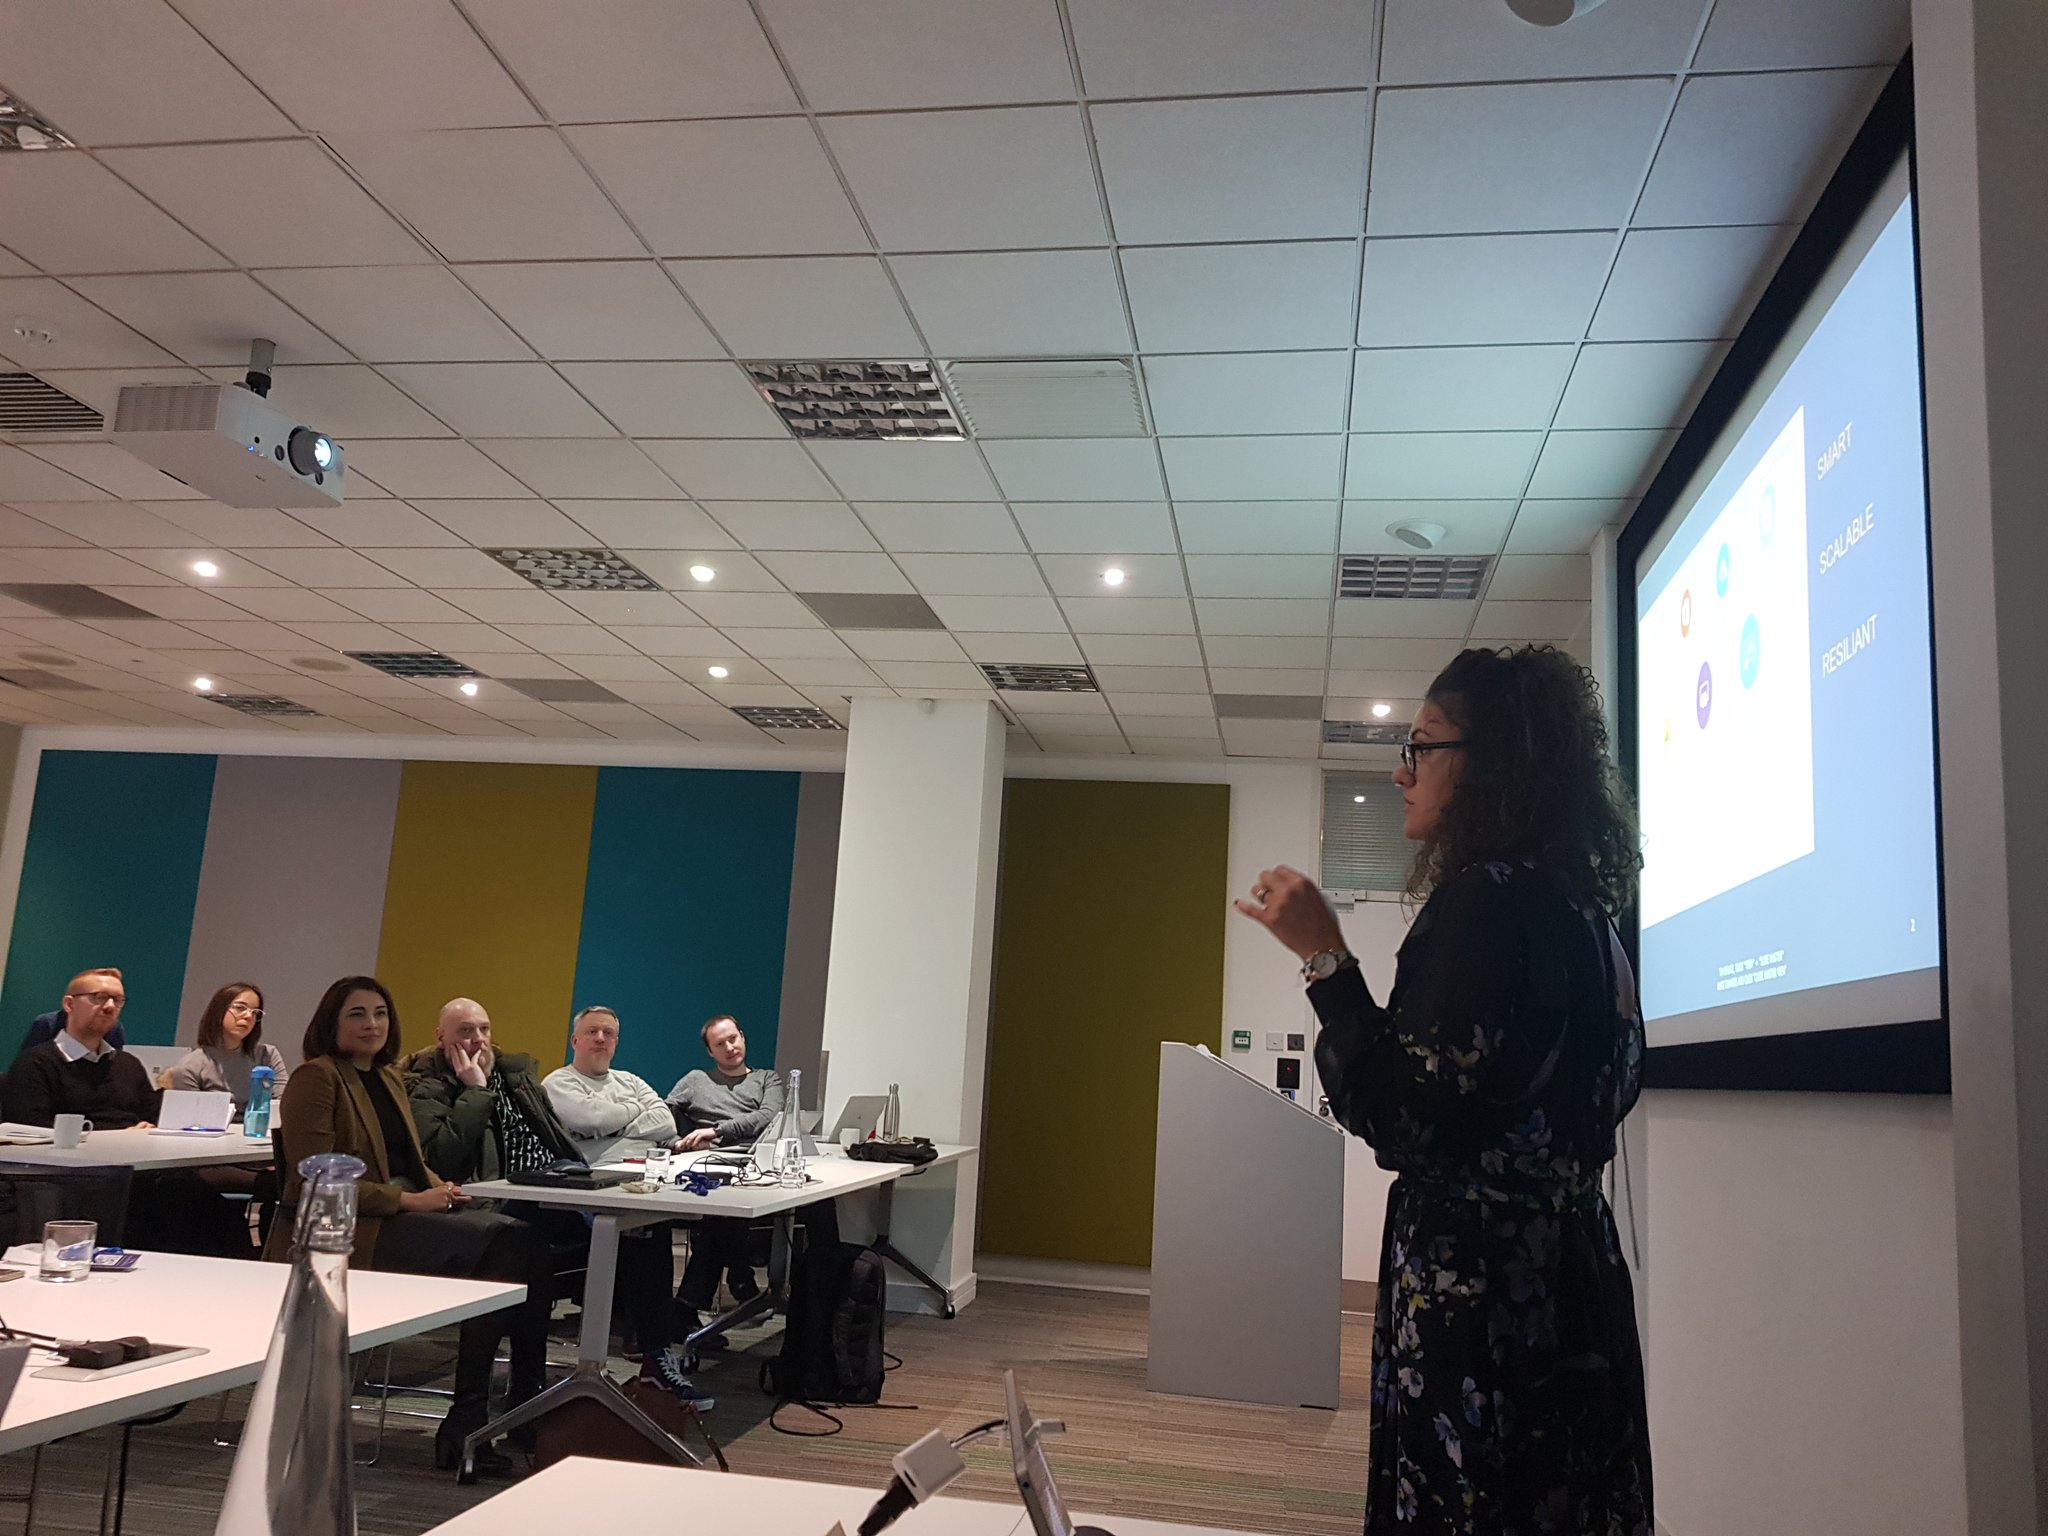
Today I attended a ‘BusApps@Speed’ day (BusApps refers to Business Applications) at the Microsoft campus in Reading. The aim of the day was to give a whistlestop tour through many different applications, including some that I’m not that familiar with (in terms of the functionality and integration). Organised by Chris Huntingford (who also took most of the pictures that I’ve used below), it was really great to learn & broaden my knowledge and understanding of the different applications/functionality that can be used

A quick summary is below:

Image

Chris kicked off the day in his usual style, talking about how the landscape has changed and evolved. Quickly covering abilities that are now present in Power Apps, Power Automate and Power BI with quite some finesse, we were immediately entranced and ready for the rest of the day.

Image

Ruth Forster-Towne from FourVision gave a presentation about Human Resource, which is what Talent has been rebranded to (along with some changes). There were some gaps in the functionality, so FourVision brought several HR ISV solutions to the table to fill these gaps, which is really great to see. The ability to have a standard integration for payroll gives the option for companies to use a local payroll provider in order to be compliant with the necessary legislation (as this can change extensively from country to country!)

Chris Haley spoke about Project for Web, Project Online and PSA. Covering some of the architecture and how best to use each one, it was quite informative as I’ve never used any of them. It was also interesting to hear that DevOps could be included alongside as a project tool, and I’m going to be doing some research into how this would work best.

Image

Afshan Ipsen blew us away with talking about ‘One Version’ for FinOps – we couldn’t believe it’s the first time she’s carried out a speaking engagement at one of these events. Talking through the continual development of the platform, and how to efficiently handle testing the new releases (minor as well as major) on a regular on-going basis. Some really amazing thoughts which can apply to all technology projects really.

Image

Thomas Carroll absolutely wowed us with his presentation on the different Reality series that Microsoft has. Augmented, Virtual and Mixed all bring amazing solutions for being able to help us get better, as well as troubleshoot situations.

Dynamics 365 Guides in particular together with HoloLens can bring the amount of time needed to skill up in a particular area down by a massive amount

Image

Jack Lewis came to talk to us about Microsoft Teams, and the amazingly cool stuff that it’s now able to do. Benefits to people using it obviously include auto-creating Sharepoint sites in the background, but what was amazing to hear was that it’s possible to surface some Power Platform capabilities within Teams itself! Imagine having a Power App right there in the Teams channel.

Paul Henwood gave an amazing session on Power BI and AI capabilities. Demonstrating some of the functionality that Power BI can bring to the table (along with some of the noticeable limits when it comes to data sizes and processing), it was great to learn how AI can really feature. I’ve only played around with Power BI a little bit, and it’s definitely on the list of things that I’d like to take a further look into!

Image

Ana Demeny talked to us about integration architecture, and pointed out very clearly that the ‘right solution’ will always depend on the exact circumstances of the project. It was very clear that it’s vitally important to clearly understand all of the different components that could be used from the entire platform, and apply them in the right way for handling the business scenario, as well as licensing/cost considerations.

Pavlos Vasileiadis talked to us about the importance of having a Centre of Excellence for Power Platform objects (ie Power Apps). Unfortunately I was too engrossed in his session to take any pictures, as it was so excellent! Covering what’s needed to enable a CoE to run and function, as well as how it should be structured for success.

Image

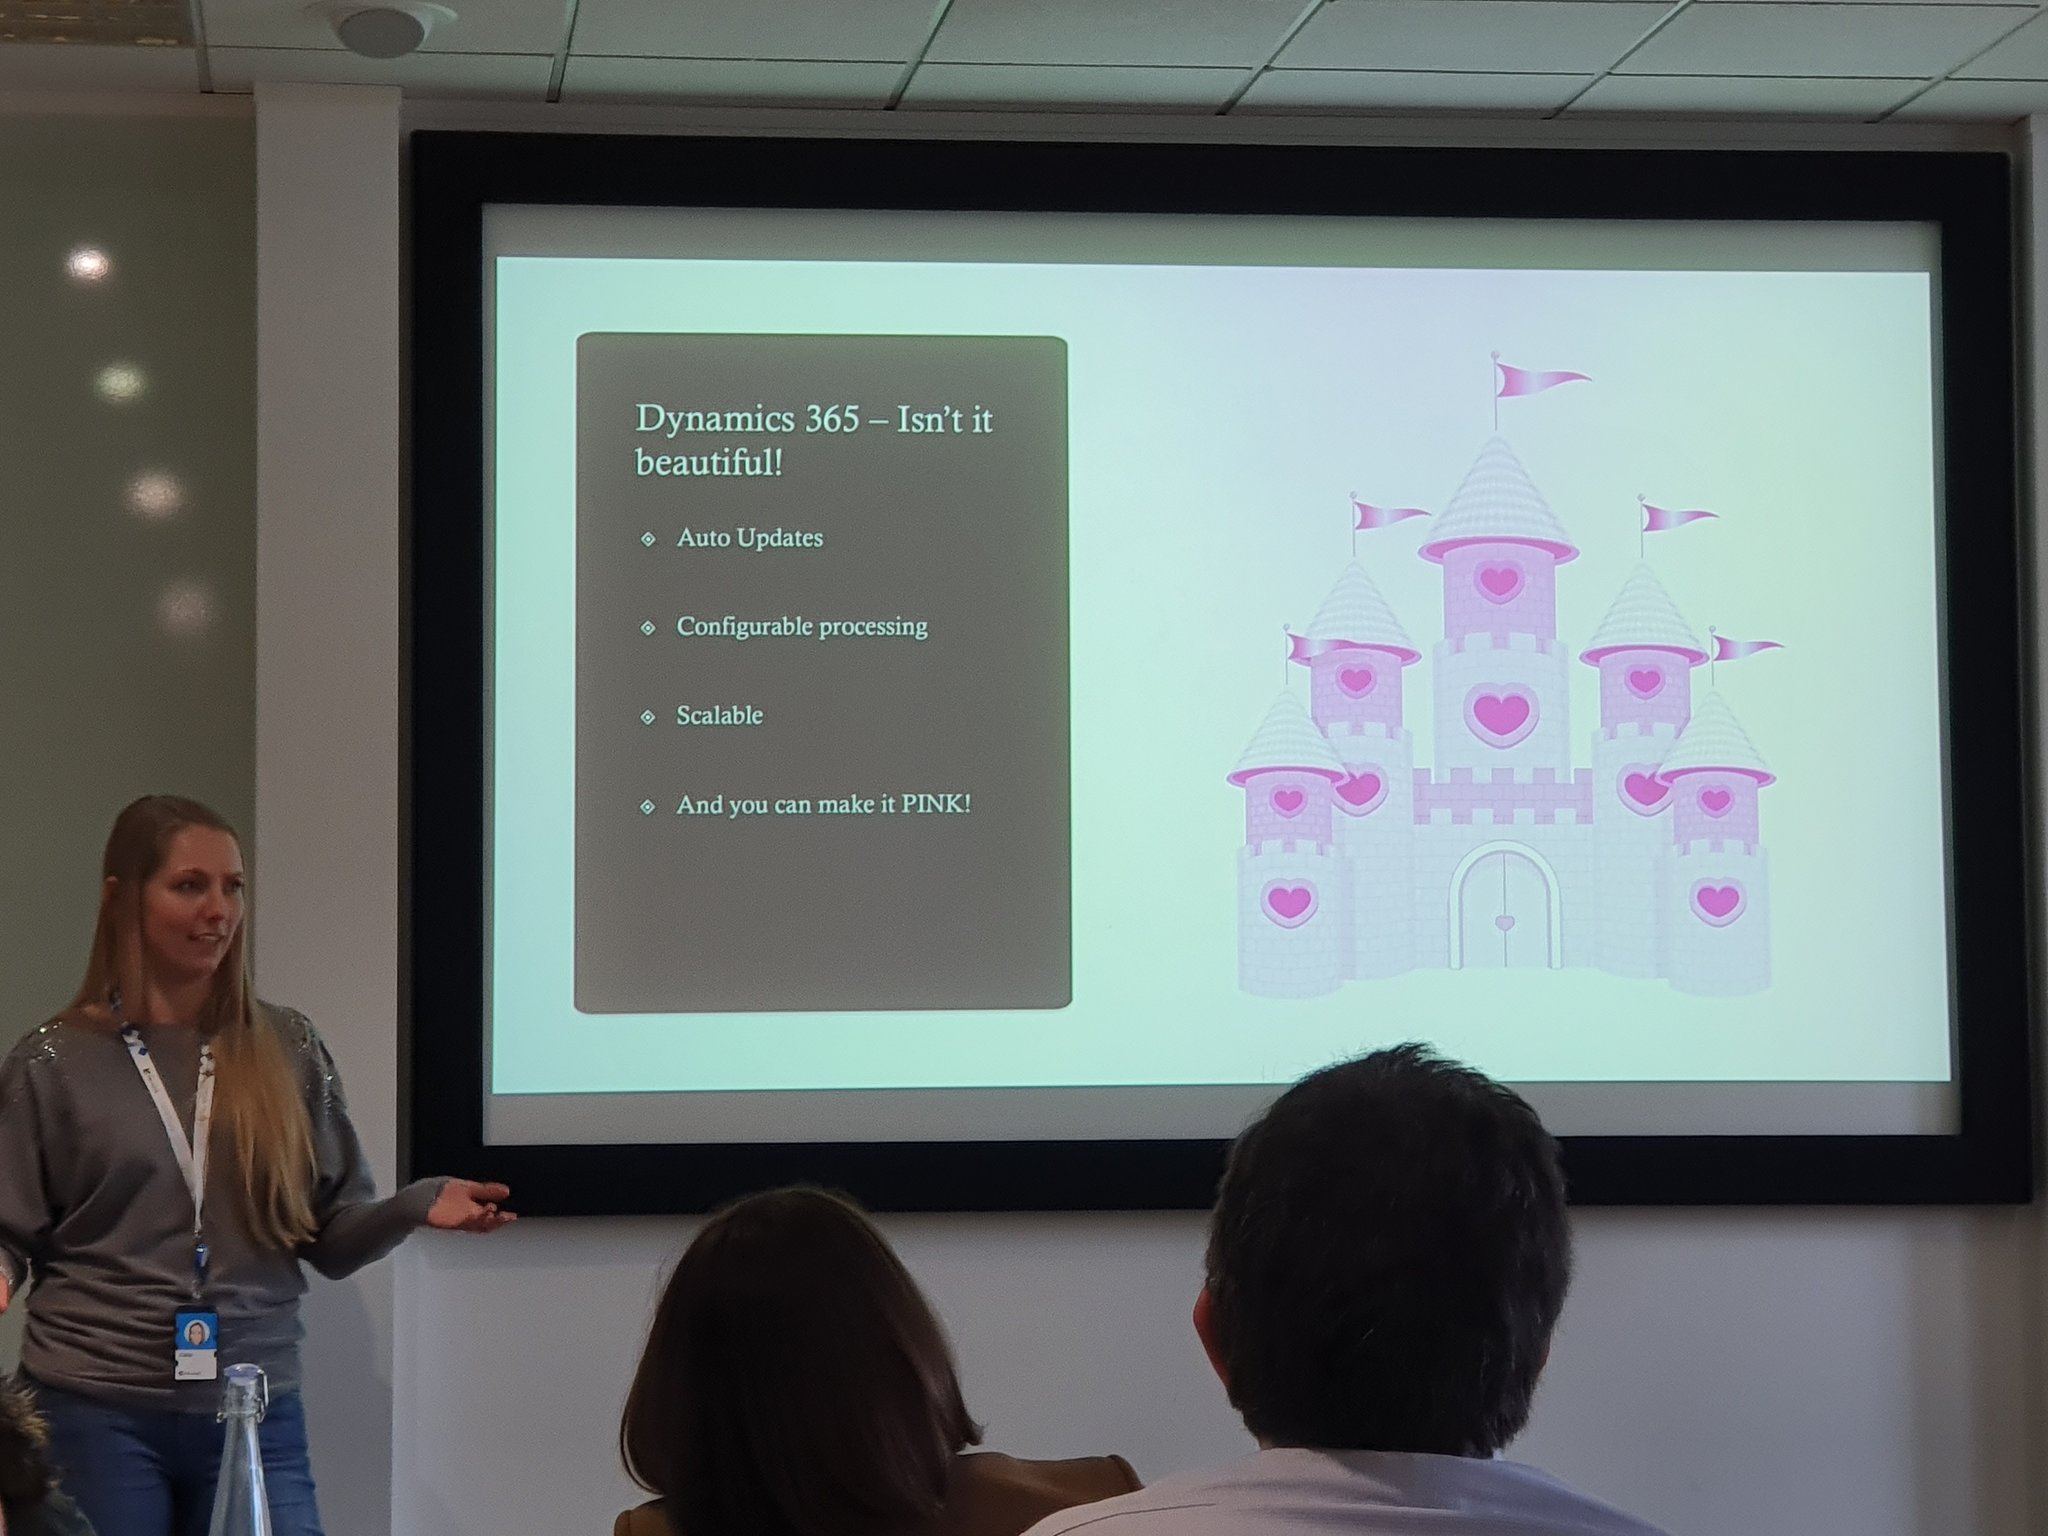
Kaila Bloomfield led the final session, showing how wonderful everything would be if it were all pink! This talked about the capabilities of the different options of Power Platform versus Azure functionality, and that it’s not always a case of just being able to use Power Platform components without running into issues.

Microsoft and the Not-For-Profit Sector

This is a slightly different post to the ones that I usually do, for a number of reasons. Firstly, it’s something that I’ve been wanting to do a post on for a while. Secondly, the release notes for Wave 1 2020 drops today, and I’m obviously wanting to do a write-up on the details from it as soon as I can!

So, the Not For Profit (NFP) sector. Well, organisations within this sector can vary, of course. There are classic examples such as Greenpeace and the National Trust (for those people outside of the UK, take a look at http://www.nationaltrust.org.uk/ for more information on what this is, and what it does.

There are also many other examples, namely charities. Now there are a great many types of charities, ranging from the Great Ormond Street Children’s Charity (Great Ormond Street Hospital, or GOSH as it’s known for short, as a world-renowned children’s hospital based in London, UK) to local small community charities.

Where am I going with all of this? Well, it’s quite simple actually. Microsoft provides low cost access to their software and offerings, as well as some free items as well. In fact it’s incredible how extensive this can be! (there are of course other organisations that provide similar offerings too, which shouldn’t be forgotten).

As part of my involvement in my local community, I’m the IT administrator for several community charities/organisations (yes – I’m the one they call to reset their password when they’ve forgotten it!!). In my role for them, I’ve used Microsoft offerings such as Office 365, as well as PowerPlatform apps sitting on the CDS to get things working more efficiently.

I had known for a while about the discounted software offerings that were available, such as Office (desktop & cloud versions) and other software.

There’s a global company called Techsoup (https://www.techsoup.org/) who’s mission is to build a dynamic bridge that enables civil society organisations and social change agents around the world to gain effective access to the resources they need to design and implement technology solutions for a more equitable planet. Companies such as Microsoft partner with Techsoup, and once a charity is qualified and confirmed by Techsoup as meeting all of the necessary criteria, they can sign up for and purchase software. It’s really amazing to see the extensive catalogue available, and can really help the smaller organisations (who otherwise would be paying a lot for software licensing).

However, Microsoft takes this to another level. There’s a specific Microsoft NFP website (https://nonprofit.microsoft.com/) at which NFP organisations can sign up for, to gain access to resources that they wouldn’t necessarily find elsewhere.

Microsoft states there that ‘Microsoft is dedicated to making the benefits of world-class cloud technology accessible and affordable for nonprofits. We offer discounted and donated industry-leading solutions for nonprofits.’

There are currently 5 areas that are offered against:

  • Productivity Applications – this covers Office 365, Dynamics 365 & PowerBI
  • Azure credits – there’s an annual credit available for $3,500
  • Hardware – devices such as the Surface that are available to purchase at a discounted rate
  • LinkedIn for nonprofits – a greatly reduced subscription rate available, along with working directly with the LinkedIn team for fundraising and marketing solutions to drive relationships and awareness of the mission at scale
  • GitHub for nonprofits – including eligibility for a Team account with unlimited private repositories and unlimited users

This is all really great and amazing. What’s even more amazing is that there’s special licensing available around things like Dynamics 365 & the Power Platform, where I’ve been seeing so much growth recently in.

NFP organisations knowing about all of these things could then work forward to use the technology to enable & empower them (yes, this is sort of a catchphrase of me, I know…). They could do this either themselves, with their existing IT people, or super/power users who understand technology. These people could quite easily start learning the skills to use such tools as PowerBI, PowerApps, etc, and see how they could bring the technology to the best usage cases for the organisation.

Alternatively, they could partner (if they’re not doing so already, of course) with implementation providers who specialise in the NFP sector. In the UK, one of the main ones in the Microsoft solutions space is m-hance (https://m-hance.com/). They are well known within the UK for their attention to detail, and their passion for the NFP sector.

Note: For sake of clarity, I have not/do not work for/with m-hance, nor gain anything from any work that they carry out, nor from any company that may wish to engage with them from having read this post

I also personally know one of the people who work there – Mike Hartley (oh yes Mike, I am indeed mentioning you on my blog!). I’ve known Mike for a while now, and he’s one of the most passionate people that I’ve met within the Microsoft communities. I’ve chatted with him one-on-one around both technical and non-technical concepts, and have always been really impressed with how he approaches things. I’ve also attended sessions that he’s presented on, and always walked out with new ideas in mind! He’s just one example of the way in which passion and drive can really TRULY help with social and community items – we’re not even talking major scale, but rather on a local scale to help the people around us.

I have spoken to several organisations that have benefited greatly through services from Microsoft partners who work in this space, and heard how incredible the journey has been. It’s really a wonder to see their technological journey, and see how they’re making people’s lives better, one day at a time.

So….if you work in a charity, or know a charity that you think might benefit from this – speak to your company, mention this to them, and spread the word. One of the concepts that I try to practice daily is the concept of ‘pay it forward’ – do/help someone else, not because you’re wanting them to then do something for you, but altruistically. This can have an immeasurable effect over time!